
Overview
Introduction to
StorShift
Setup your source
store configuration and
destination configuration
WooCommerce
Shopify
StorShift
Zoho Commerce Migration Solution
The StorShift is a secure, web-based solution developed to help businesses seamlessly migrate their store data from supported eCommerce platforms to Zoho Commerce. It ensures a smooth and reliable transfer of essential data such as products, customers, and orders while maintaining data accuracy, relationships, and structure.
This guide explains the complete migrations process, from logging in to completing the migration
Getting Started Checklist
Before you begin the migration process, make sure the following prerequisites are completed:
- An active Zoho Commerce store ready to receive the migrated data
- Administrative access to your source platform (such as WooCommerce, Shopify)
Important Note
To use the StorShift, create an account by signing up with your email address, username, and password. Once your account is successfully created, log in and proceed with the migration process.
Accessing the StorShift
To start using the Storshift application, create your account by providing your email address, username, and password. Once your account is created, you can access the application and continue with the migration process.
Step 1: Create an Account (Signup)
1.Open the StorShift official website.

2.Click the “Get Started” or “Try Now” button.
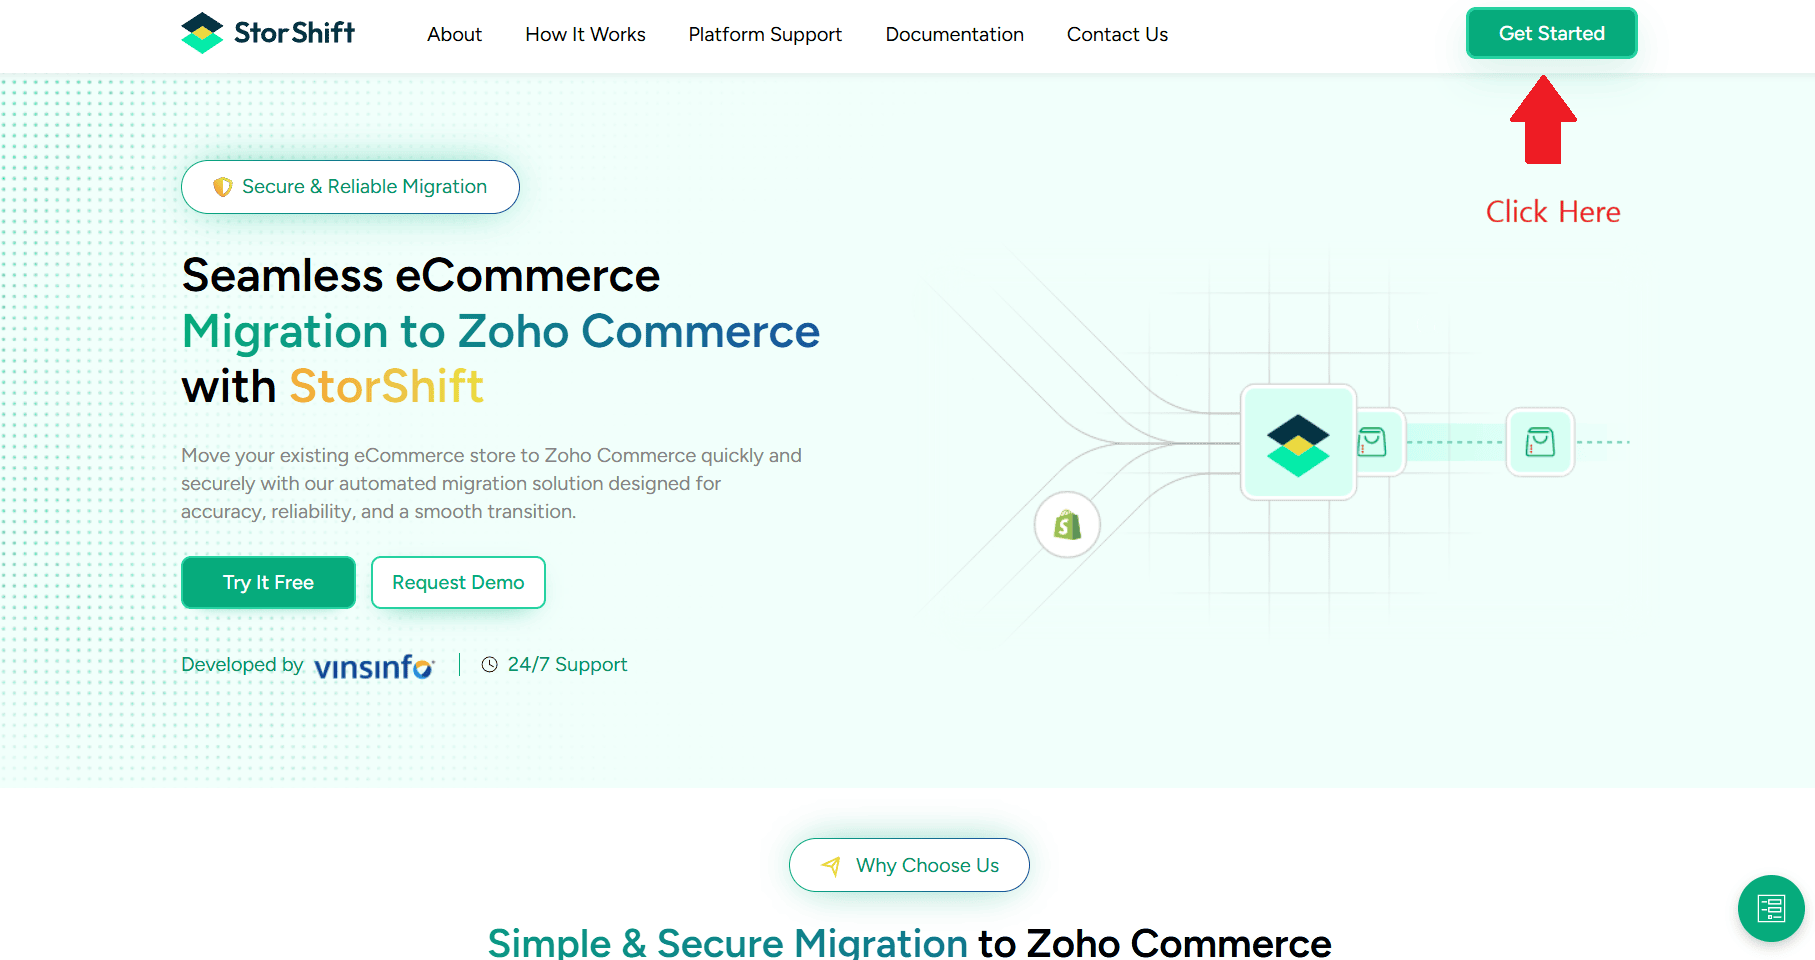
3.You will be redirected to the signup page.
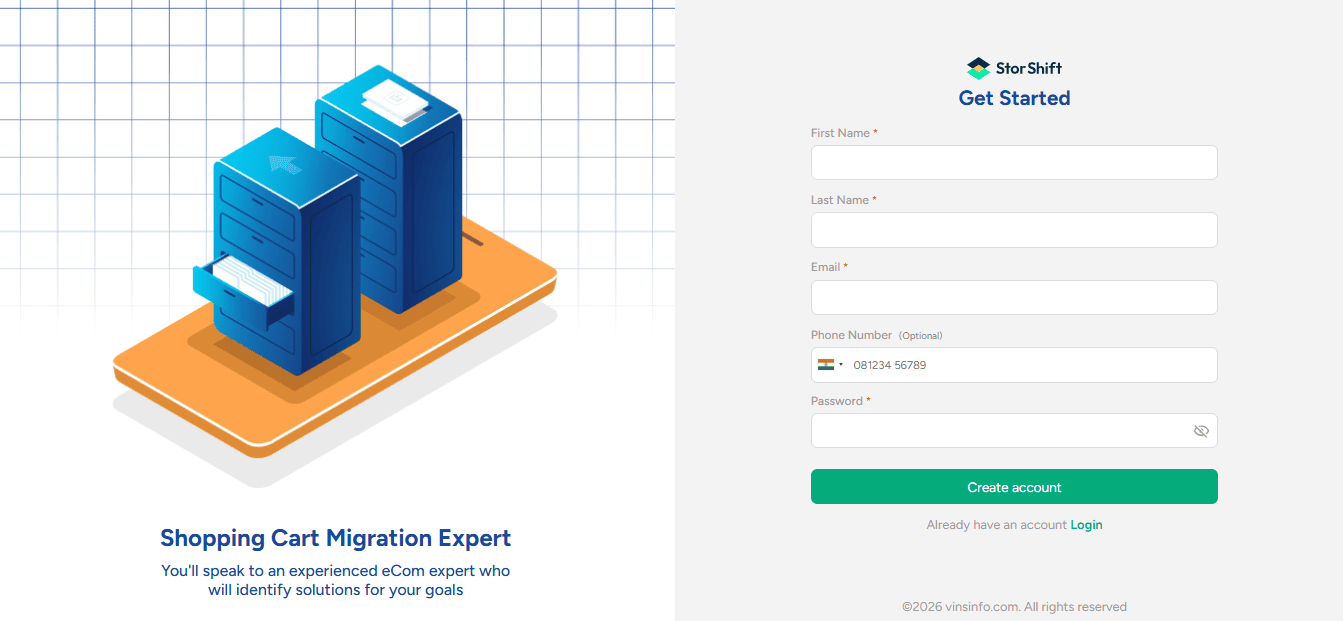
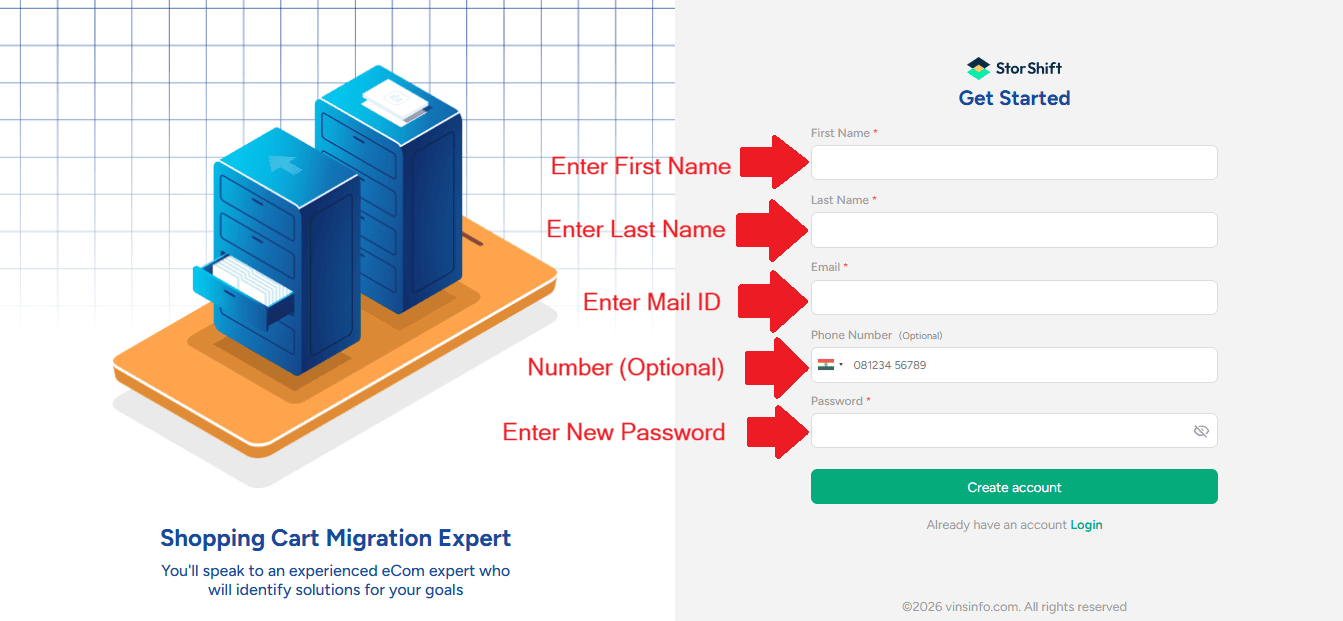
4.Enter the required details:
- First Name
- Last Name
- Phone Number (Option)
- Password
5.Click Create Account Button to create your account.
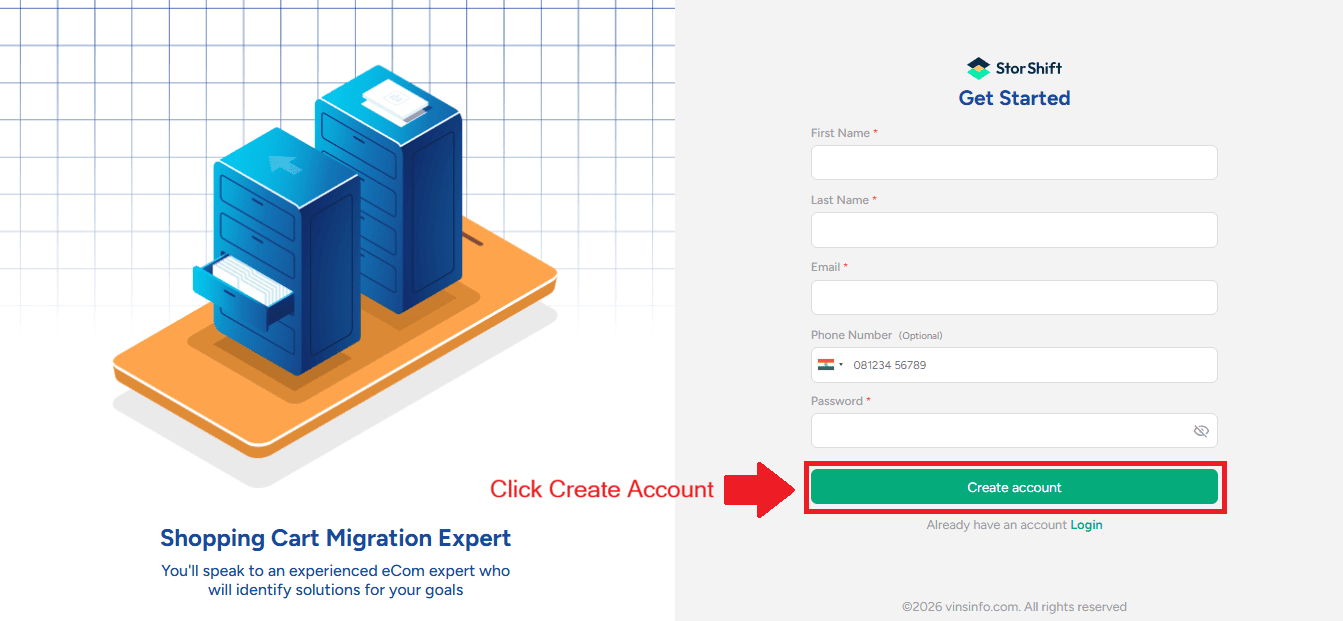
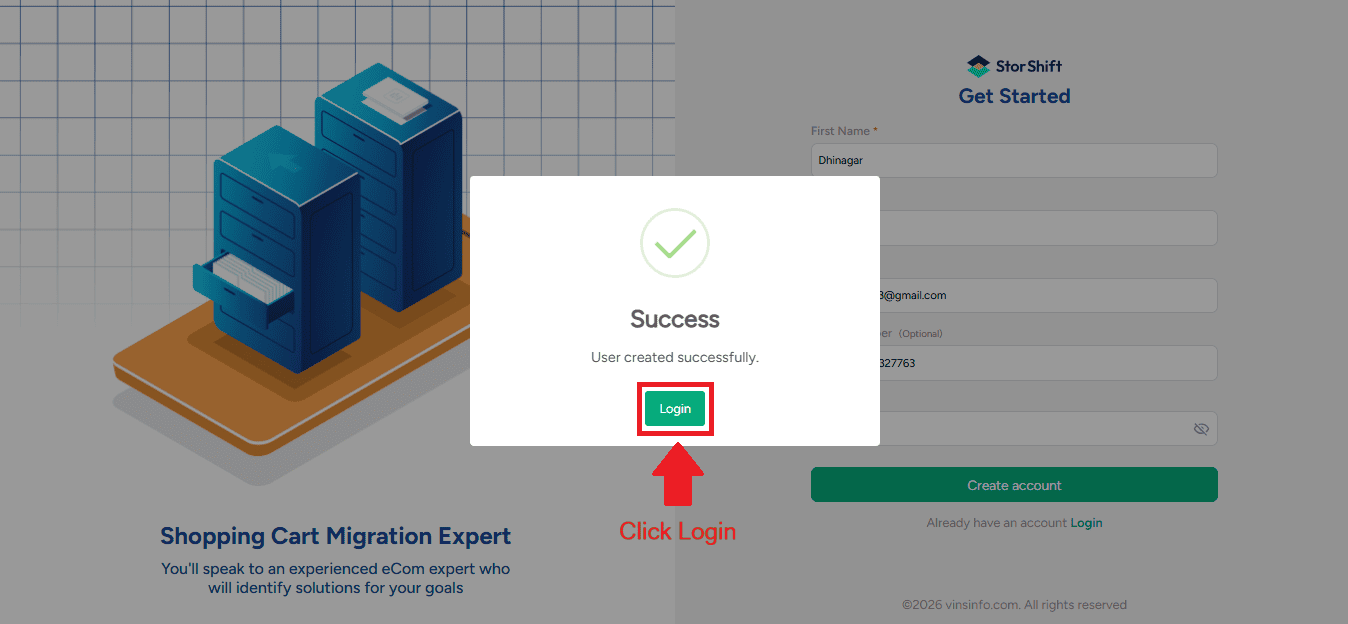
6. Once your account is successfully created, a confirmation message will be displayed.
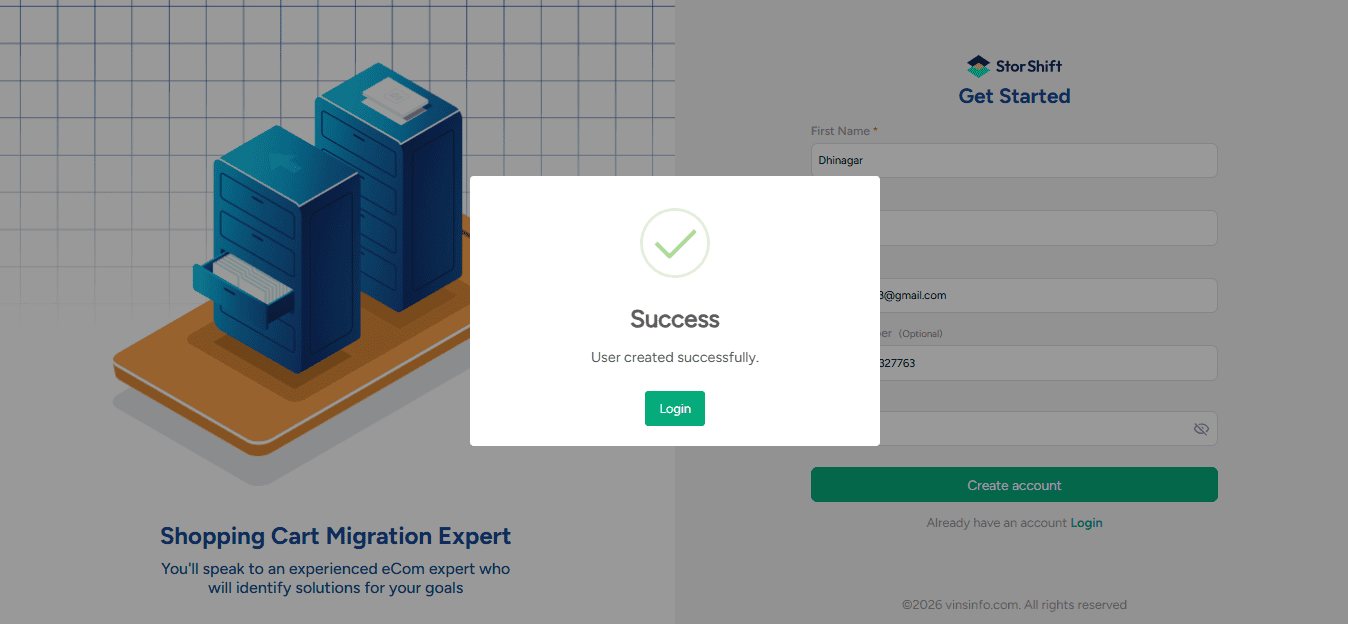
7. Click “Login” in the popup to proceed to the login page.
Step 2: Login to Your Account
1.Go to the login page.
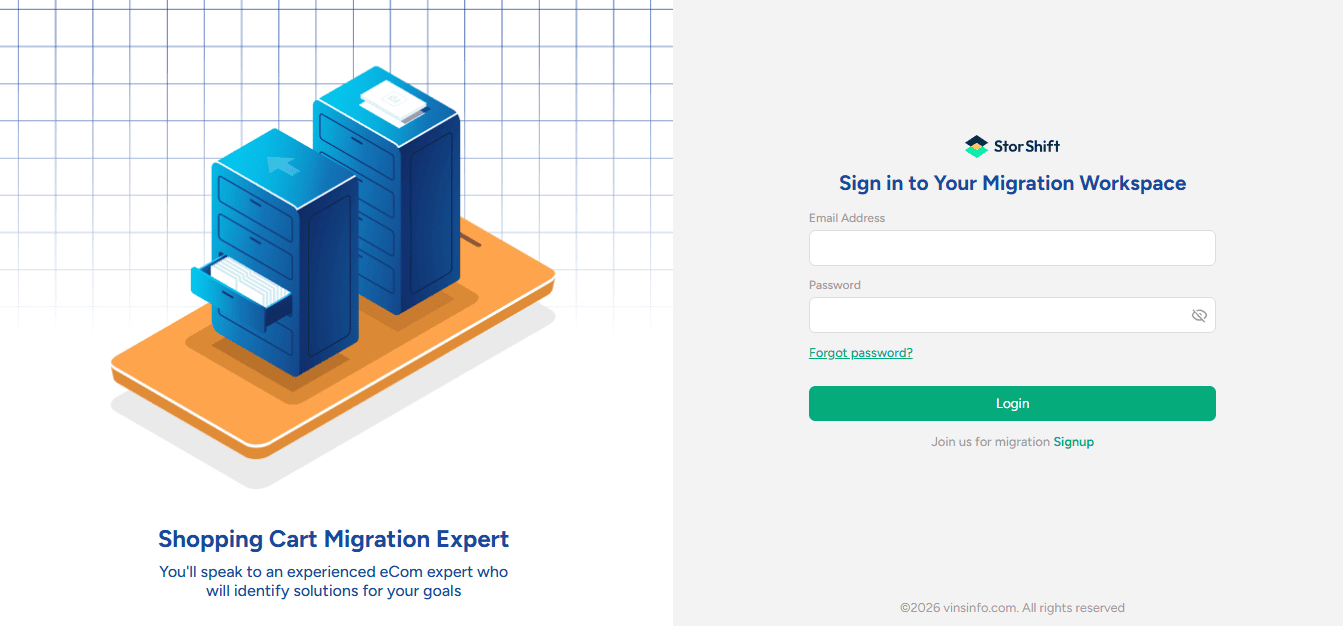
3.Enter your registered email address and password.
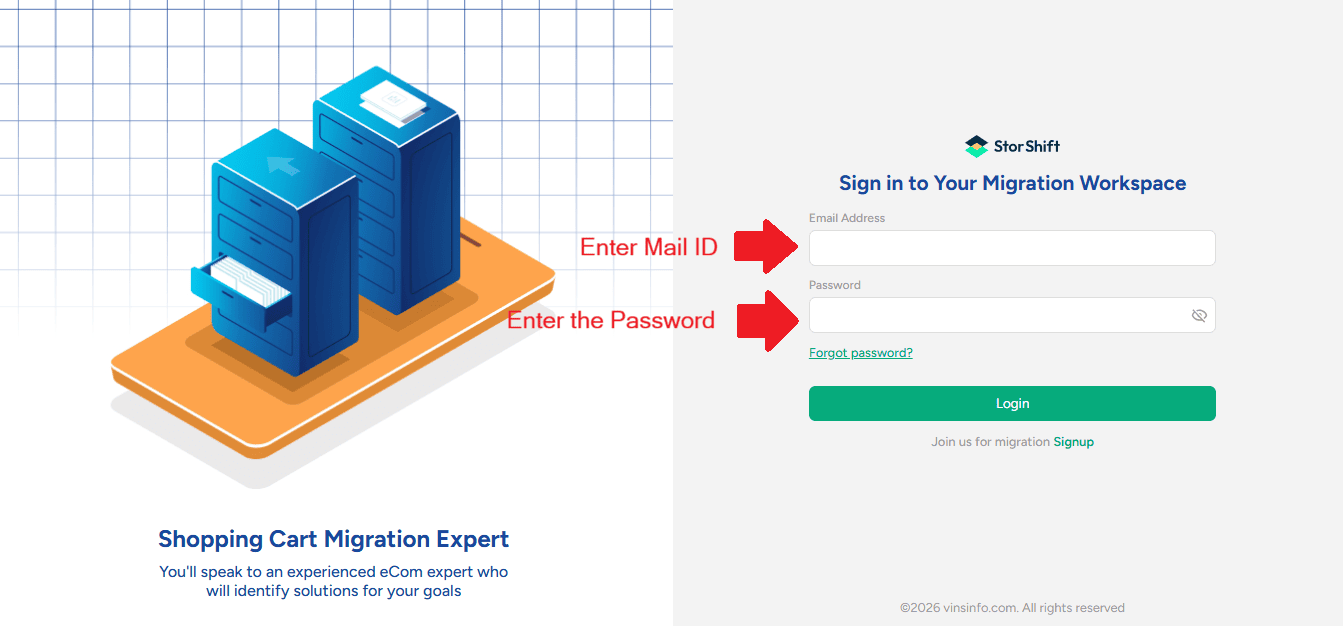
4.Click Login.
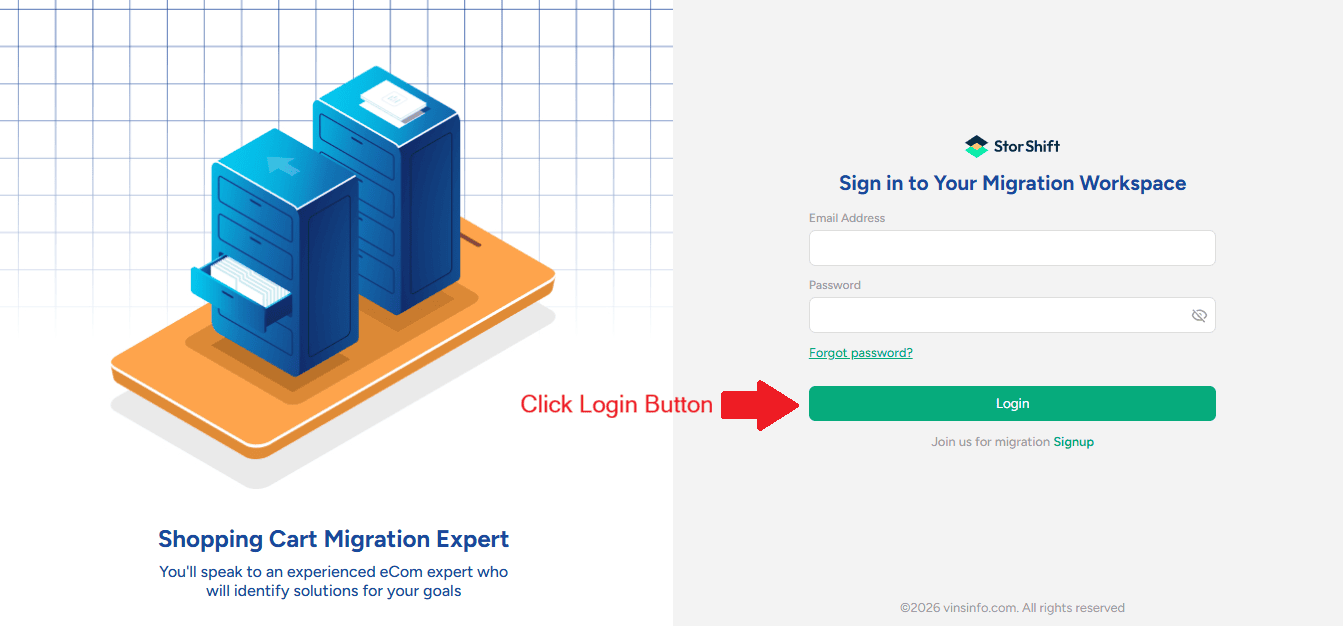
You will be redirected to the StorShift Application dashboard.
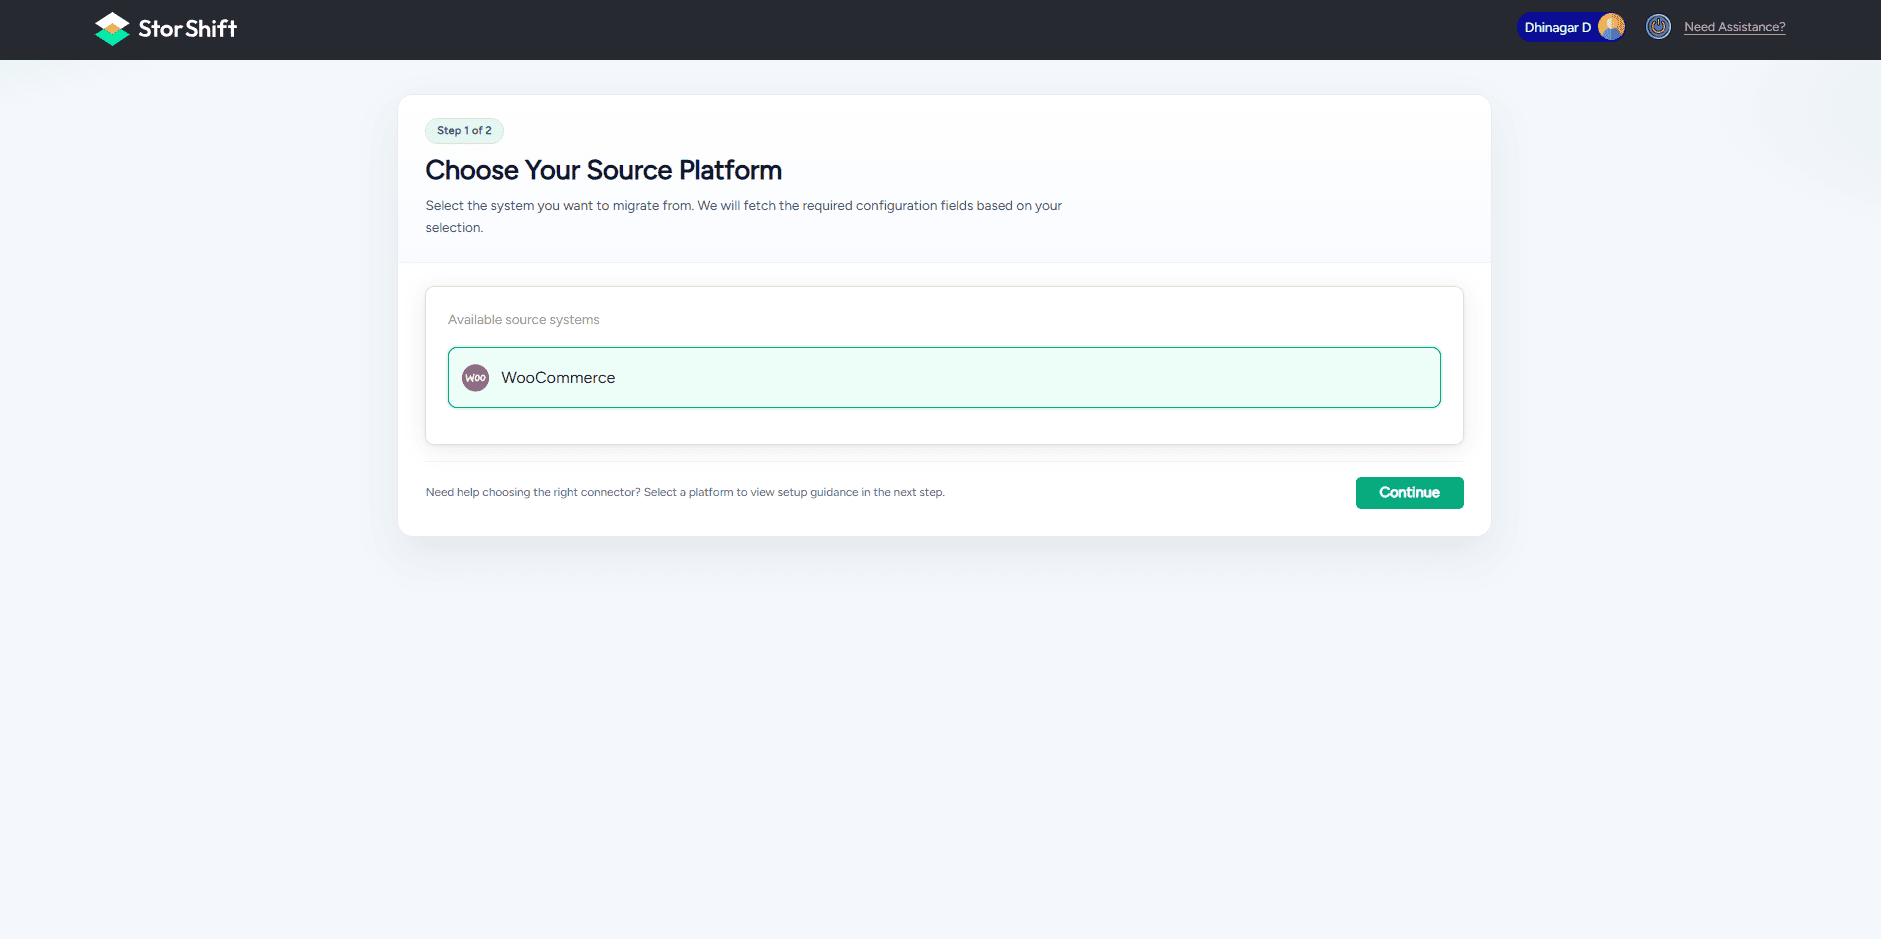
1.On the dashboard, select your source platform as WooCommerce
2.Click Continue to proceed.

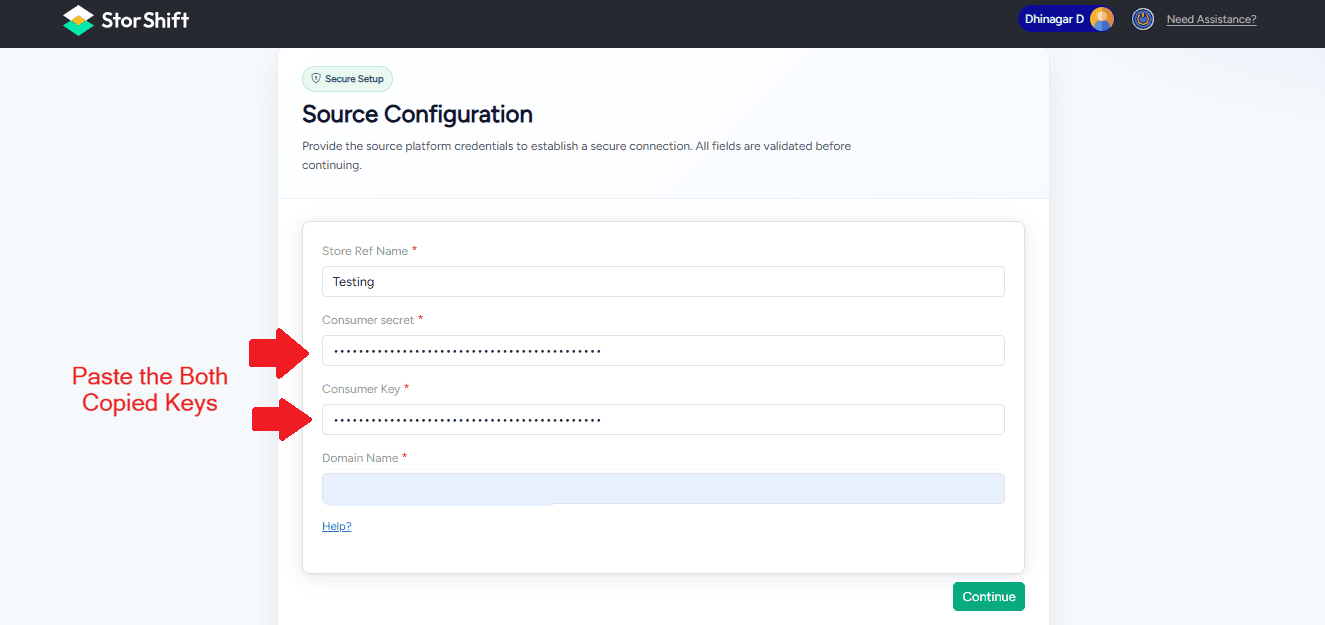
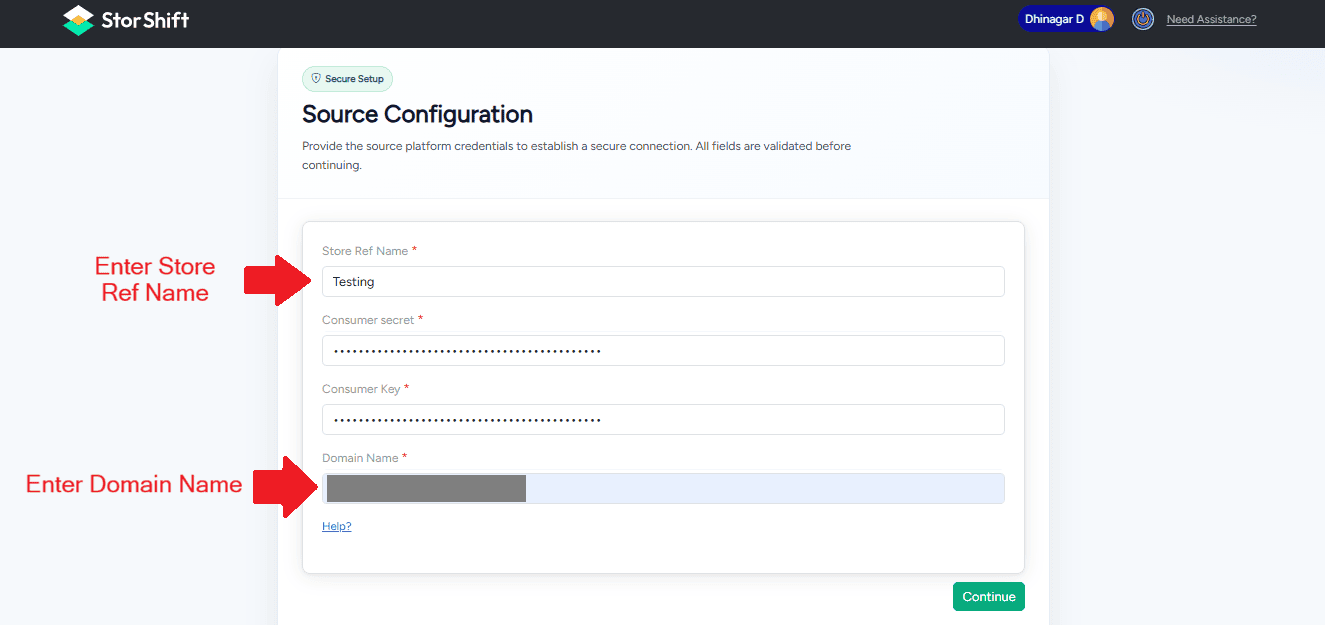
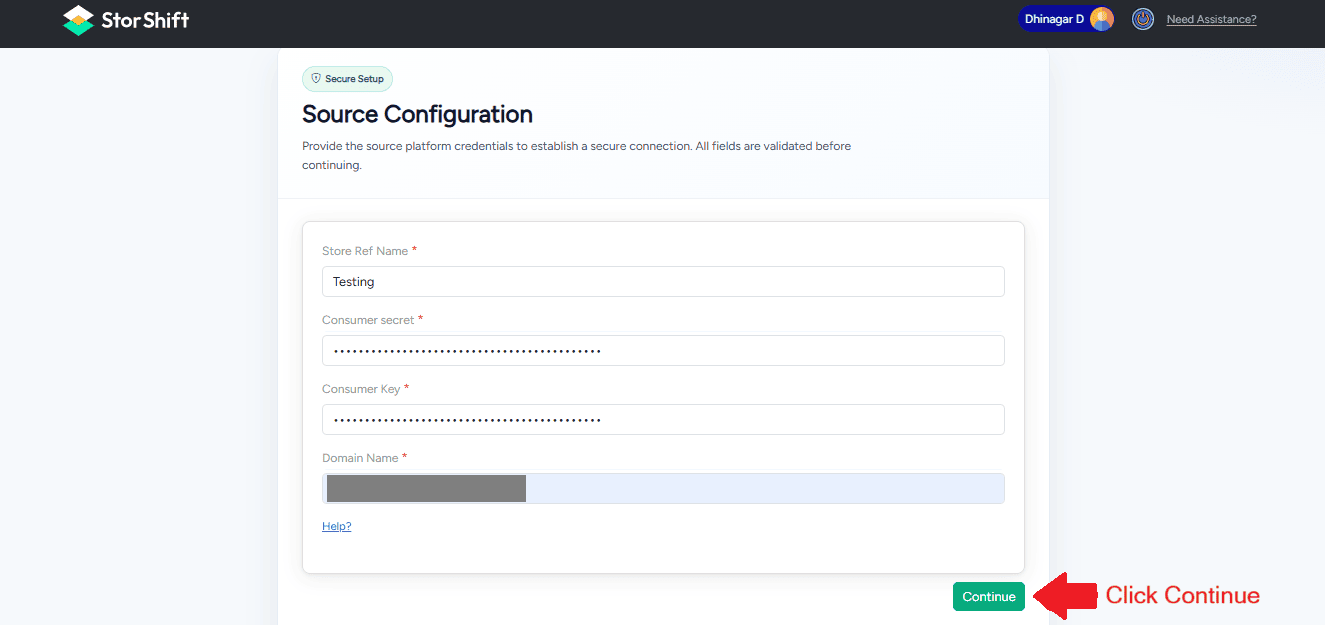
Source Configuration
Enter the following:
- Store Ref Name
- Consumer Key
- Consumer Secret
- Domain Name
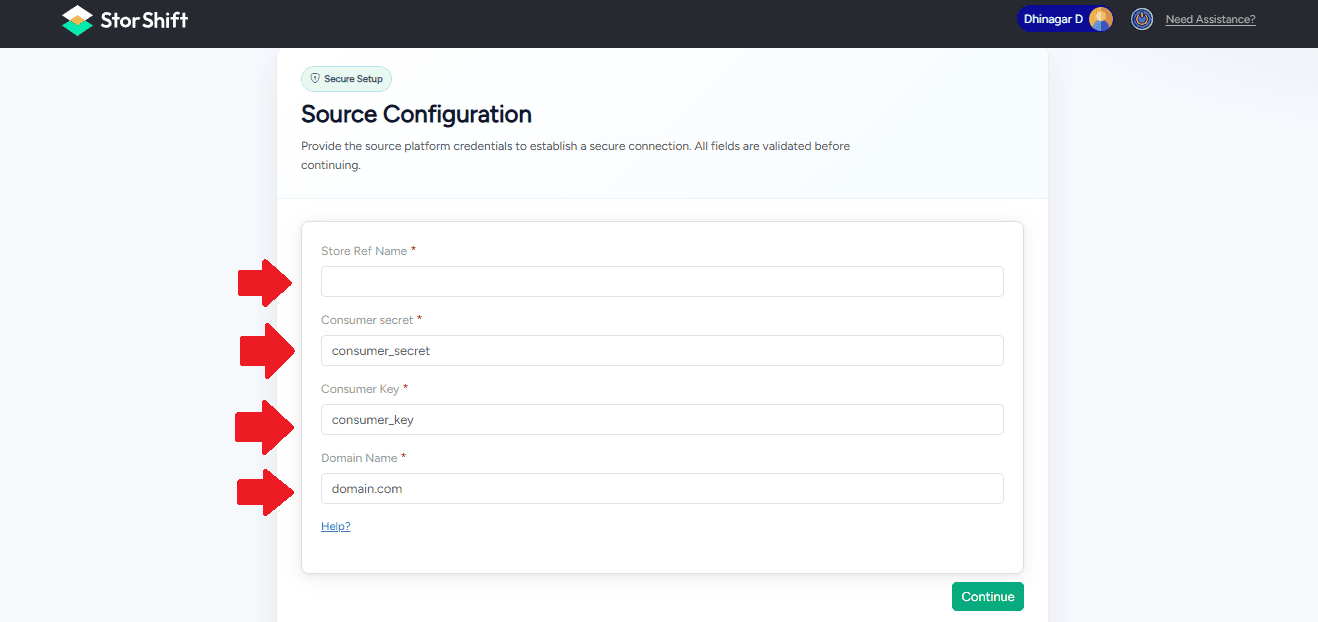
These details are obtained from your WooCommerce store.
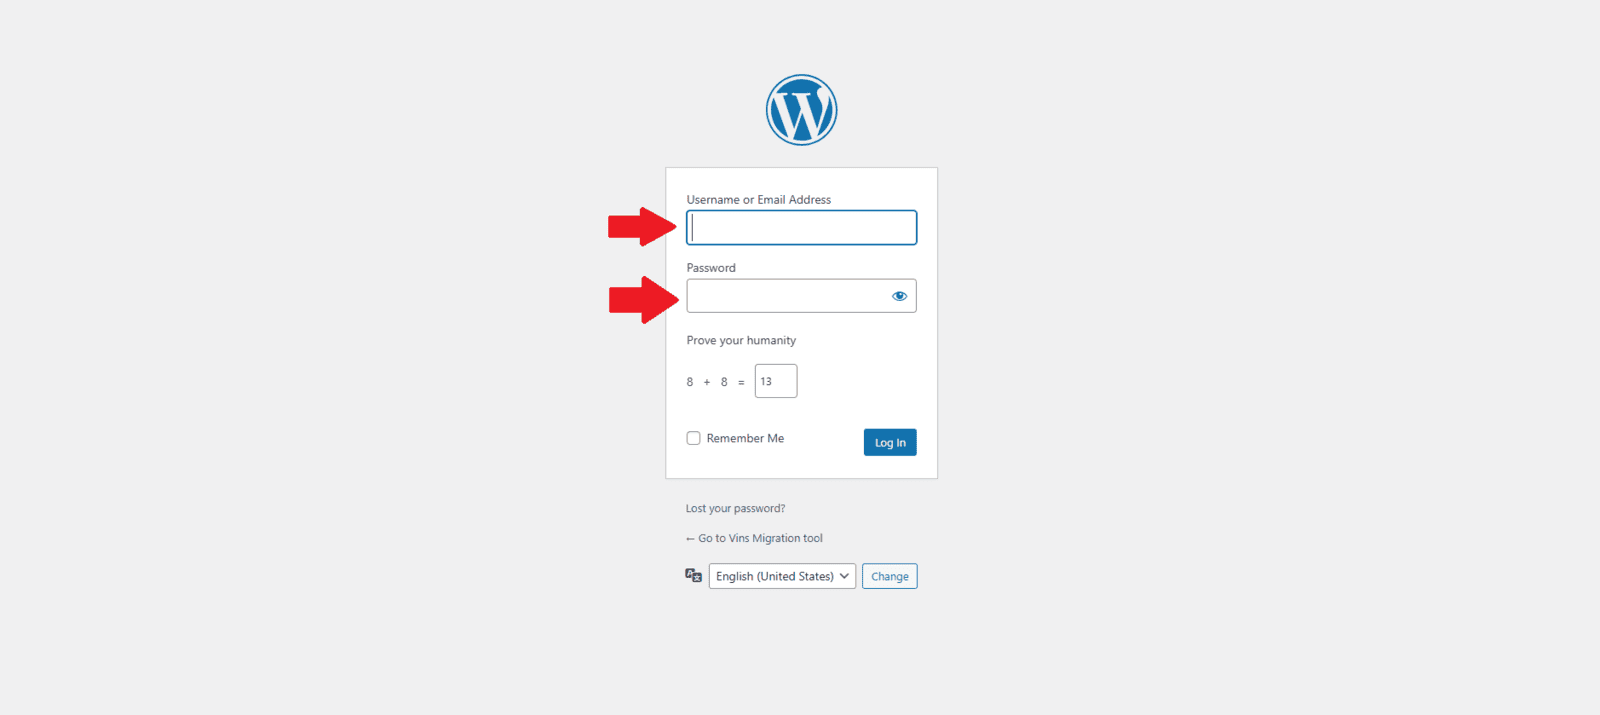
Open WooCommerce
To obtain the Consumer Key and Consumer Secret, you need to generate API keys in WooCommerce:
1.Log in to your WordPress Admin Panel.
2.Make sure you log in with an Owner or Administrator account.
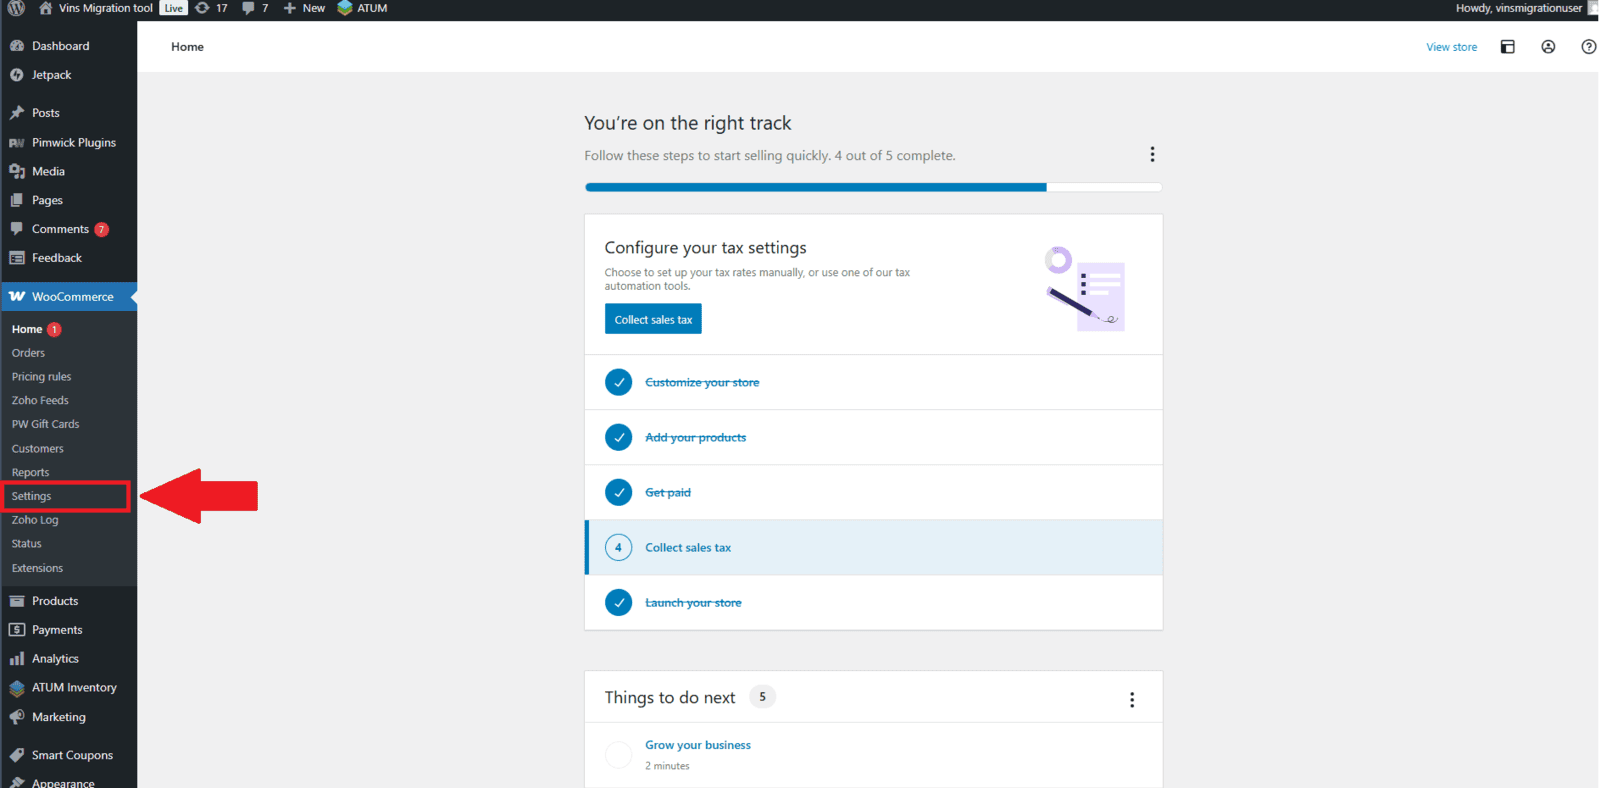
3.Go to WooCommerce.
In the left-side admin menu, go to WooCommerce and click Settings. This will open the WooCommerce settings page, where you can access configuration options such as REST API, payments, shipping, and advanced settings.
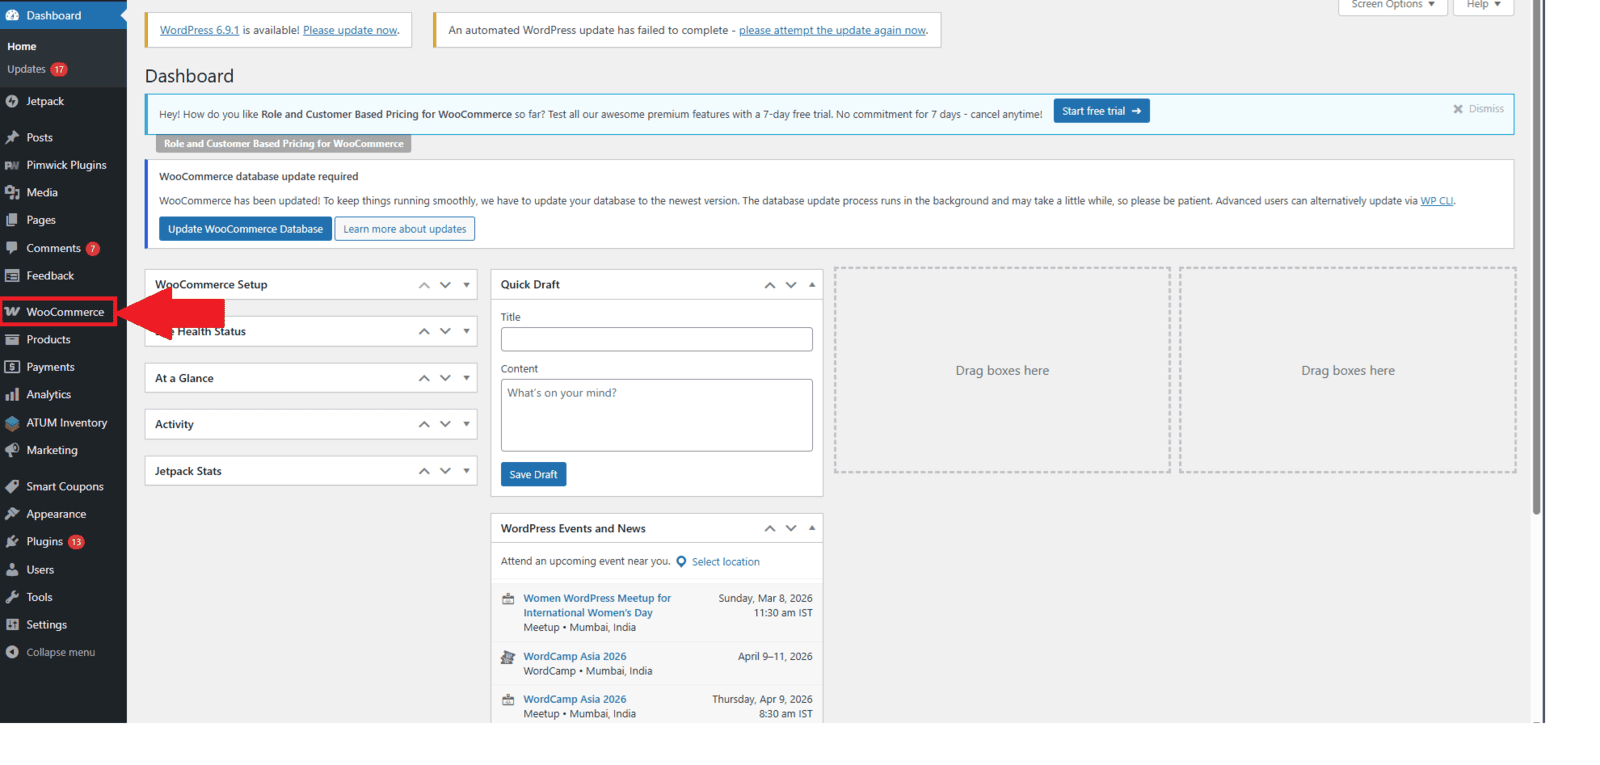
4.Click Settings.
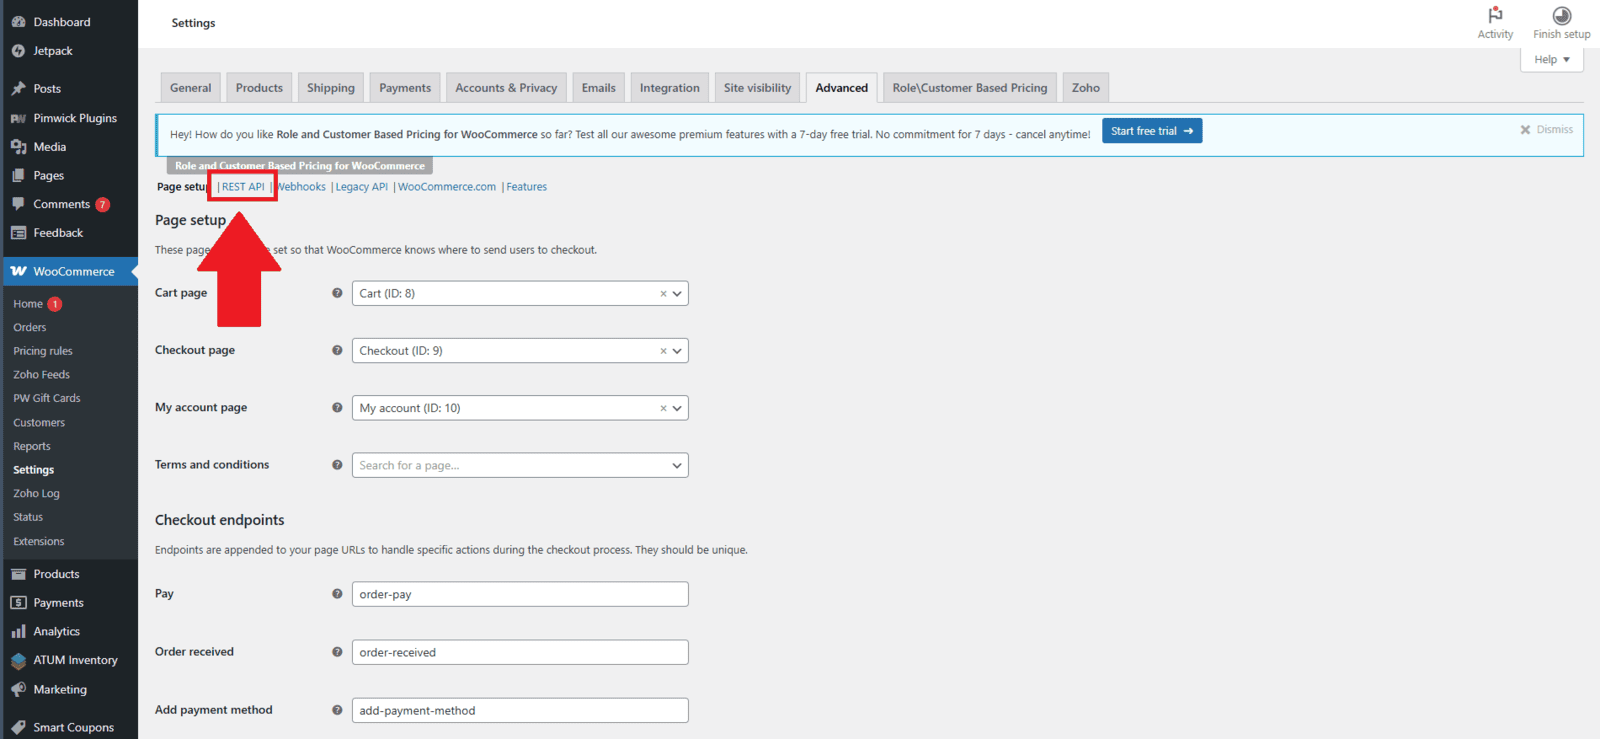
5.Click the Advance Tab

Open REST API Section
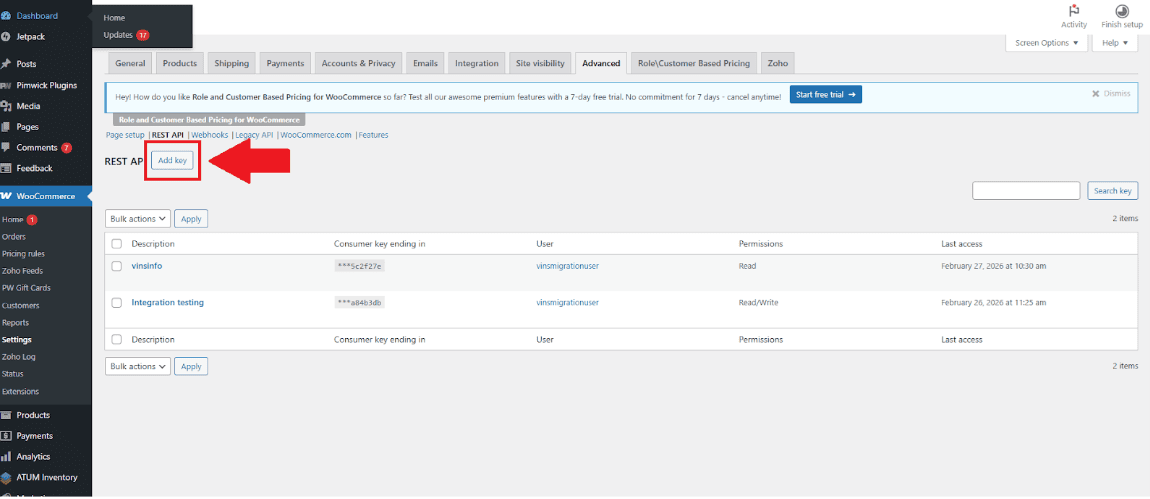
Inside the Advanced tab, click on REST API to manage API access for your store. Then click the Add Key button to generate new API credentials for migration.
2.Click Add Key Button
Get Your API Keys
Fill in the required details:
- Description – Enter a short description
Here are some sample short descriptions you can use:
- Store Data Migration
- WooCommerce to Zoho Commerce Migration
- Migration Access Key
- User – Select your user account
- Permissions – Read/Write
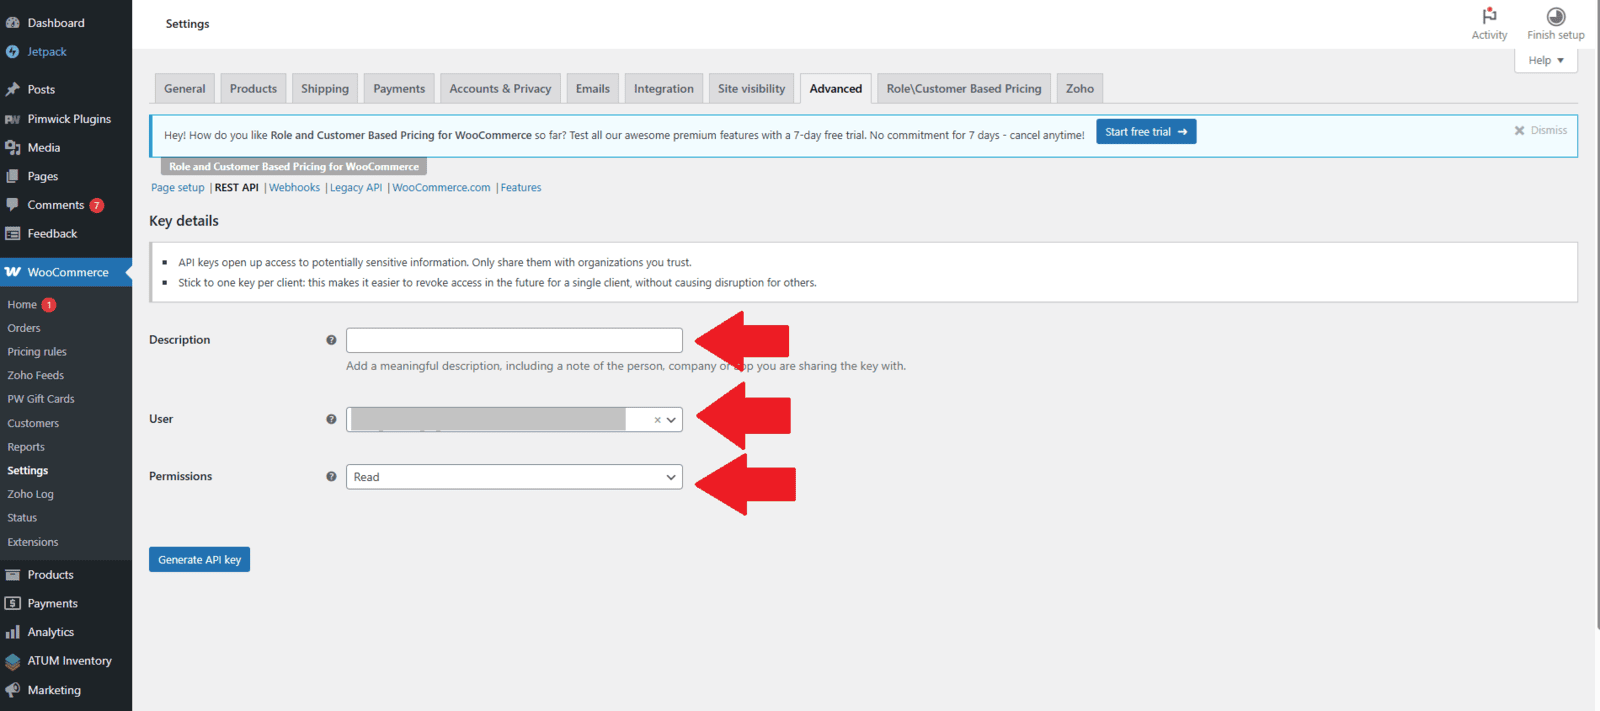
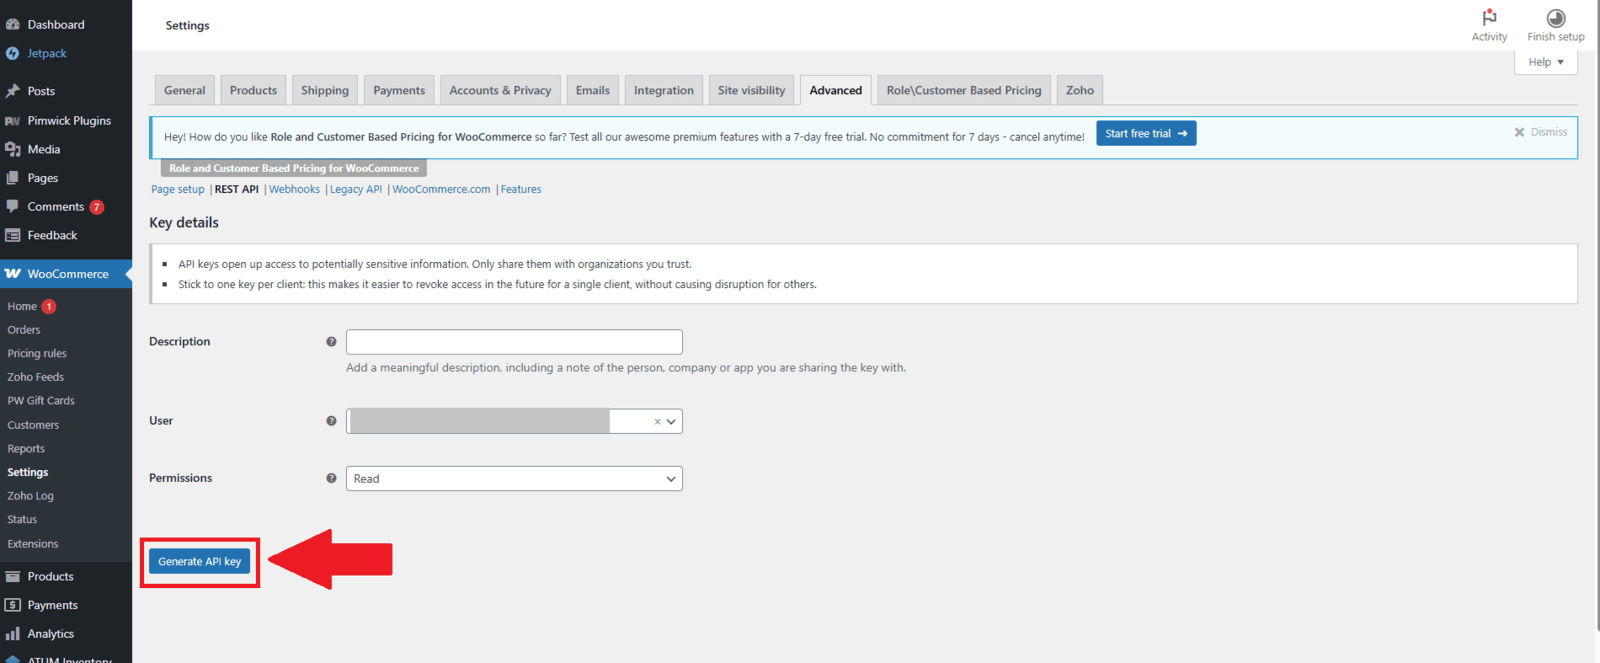
Click Generate API ley
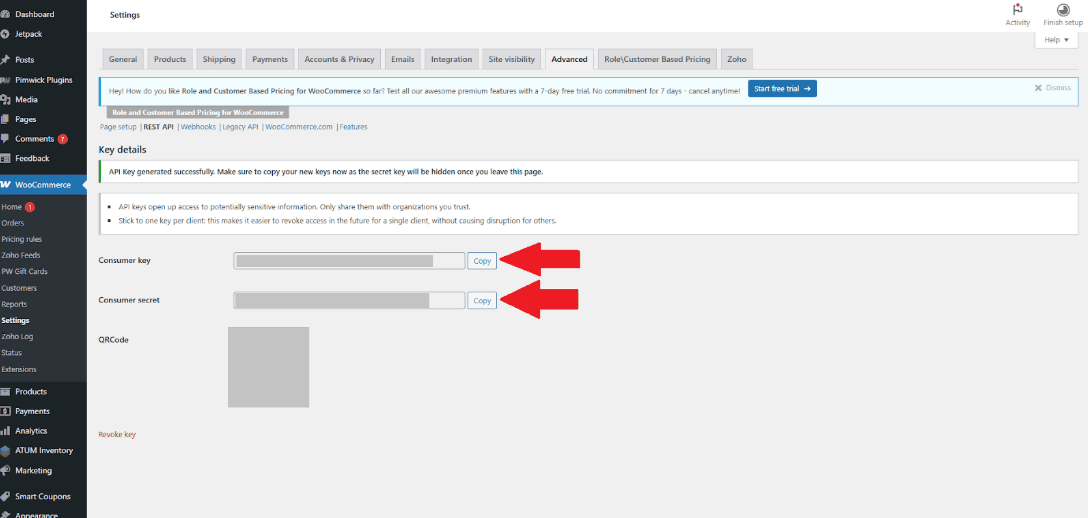
Copy and Enter API Keys in Migration Tool
After generating the keys, you will see:
- Consumer Key
- Consumer Secret
Copy both keys and paste them into the StorShift Source Configuration page.
After Generated the API keys Copy those "Consumer Key and the Consumer Secret " API Keys and paste them Corresponding Fields.
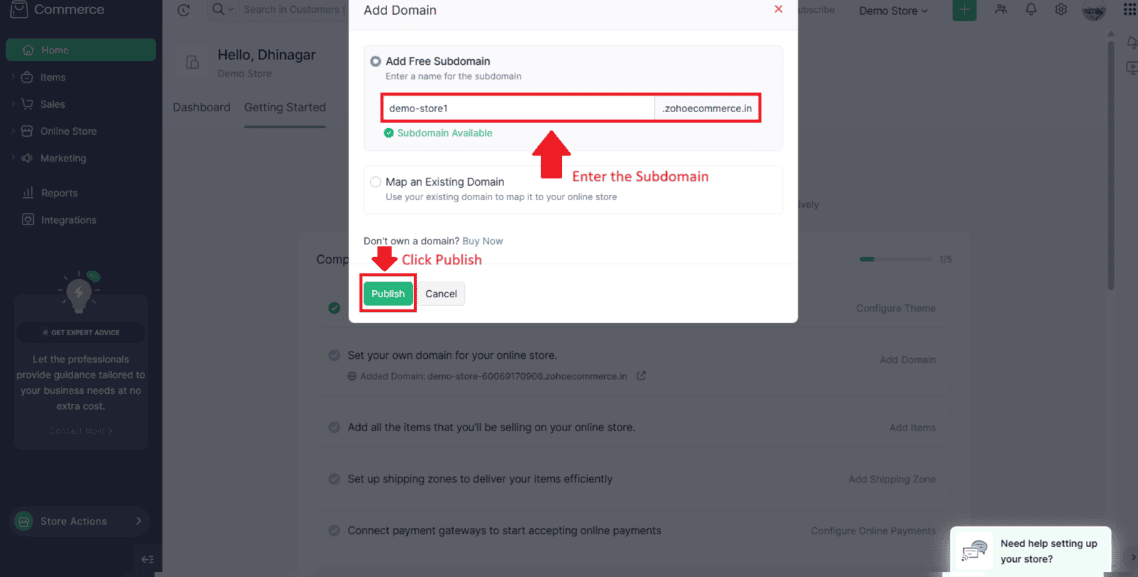
1. Enter the Domain Name in this format:
Example:
Note:
- Do not include https:// or /wp-json/wc.
2. Enter the Store Ref name - Store Name in The Zoho Commerce
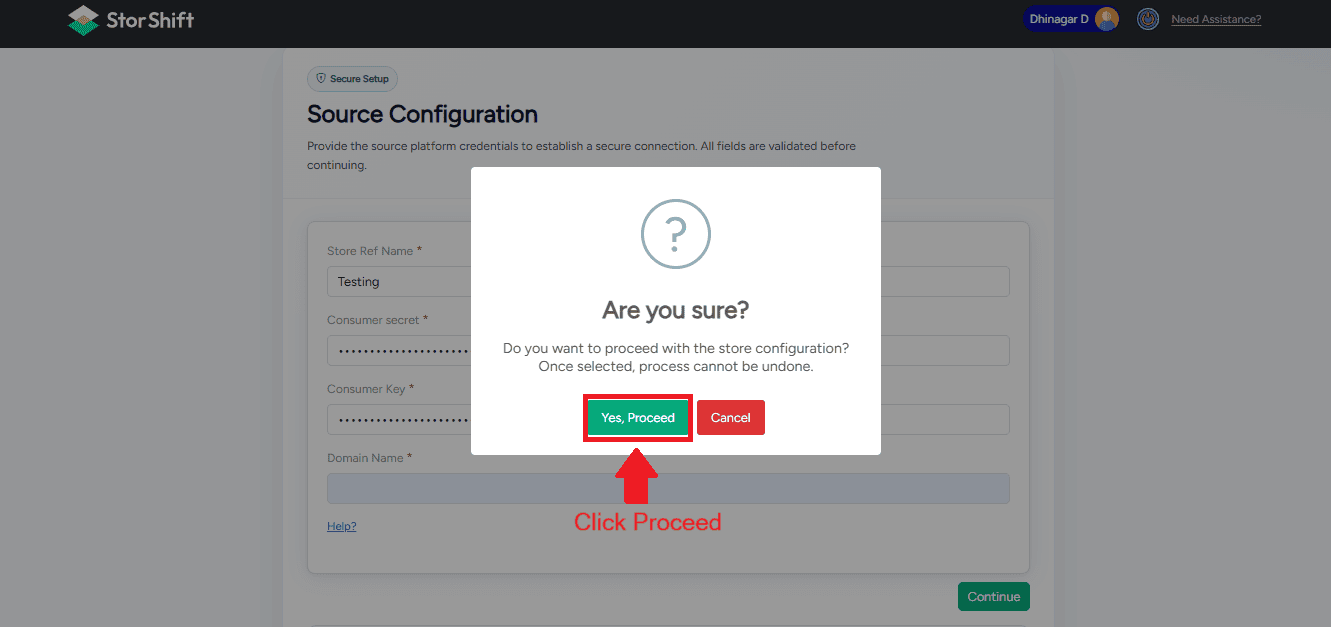
- Click Yes, Proceed to continue with the configuration.
- Click Cancel to return and review the entered details.
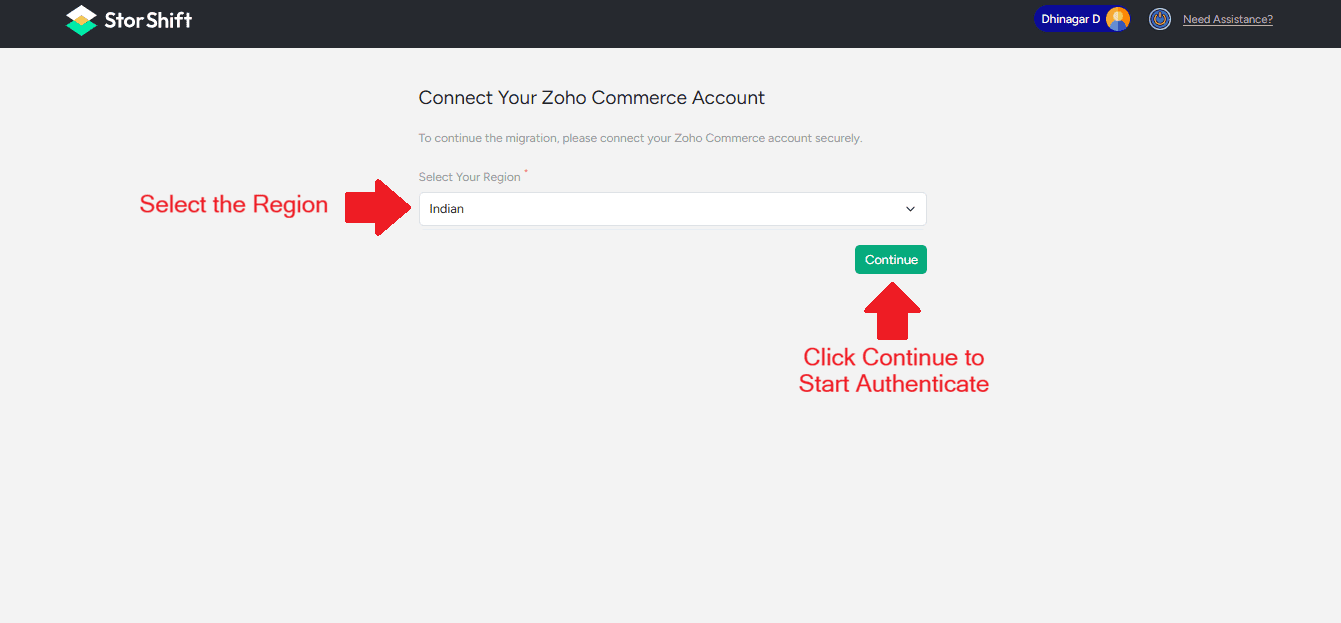
Zoho Authentication (OAuth)
Select the Region and Click Continue to start the Zoho authentication process.
Scenario 1: Already logged in to Zoho Commerce
1.Tick the confirmation checkbox.
2.Click the Accept button.

Move to Select Destination Store
Scenario 2: Not logged in to Zoho Commerce
If you are not logged in, you will be redirected to the Zoho login page for the destination store. After successfully signing in and granting the required permissions, you will be redirected back to the migration setup page. Click proceed.

1.You will be redirected to the Zoho login page where you need to sign in to your Zoho Commerce account.
2.Login to your Zoho Commerce account.
1. Enter the Mail ID (Zoho Commerce Store)
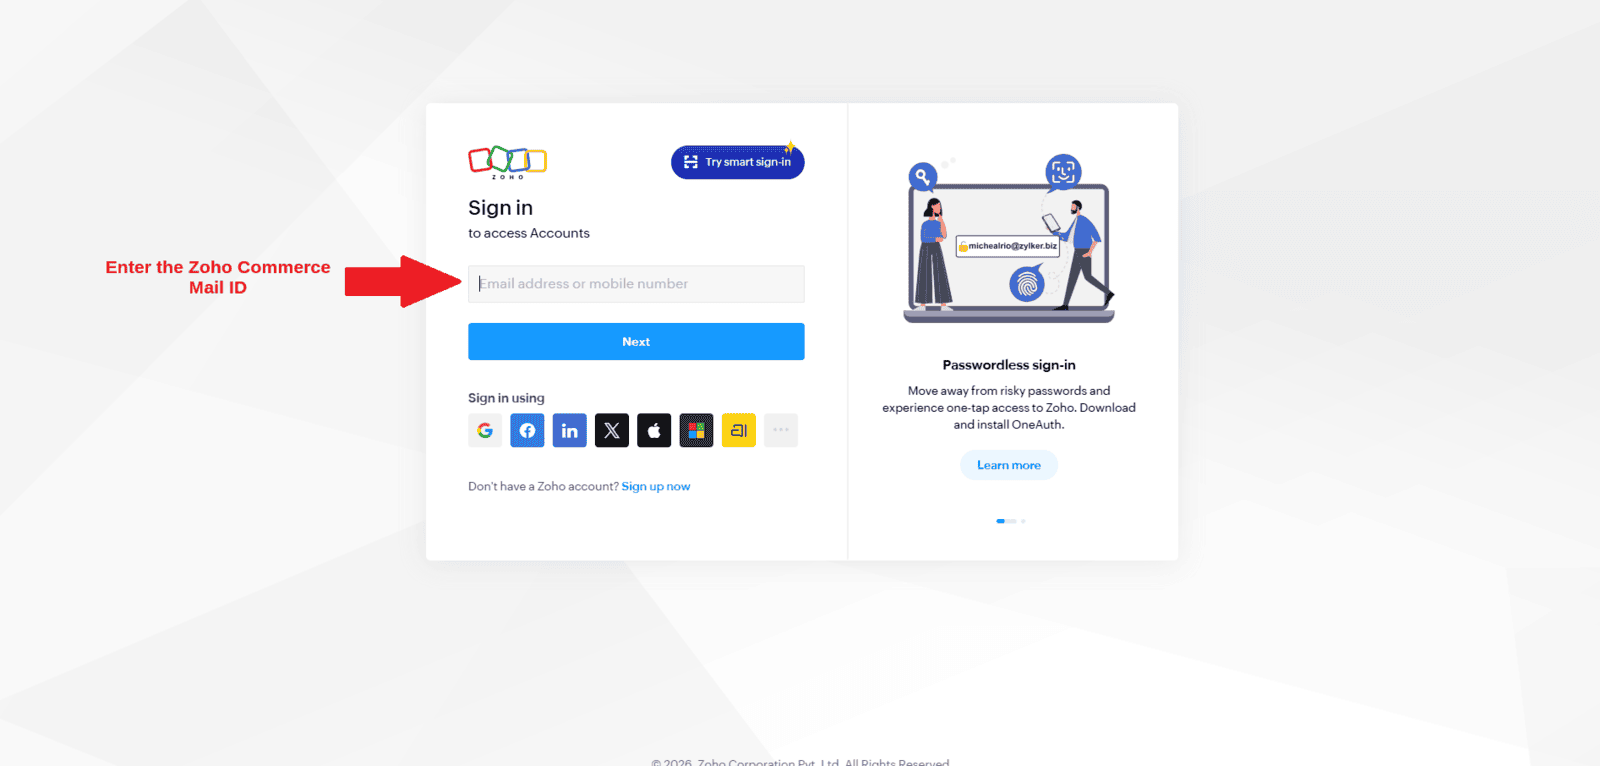
2. Enter the password
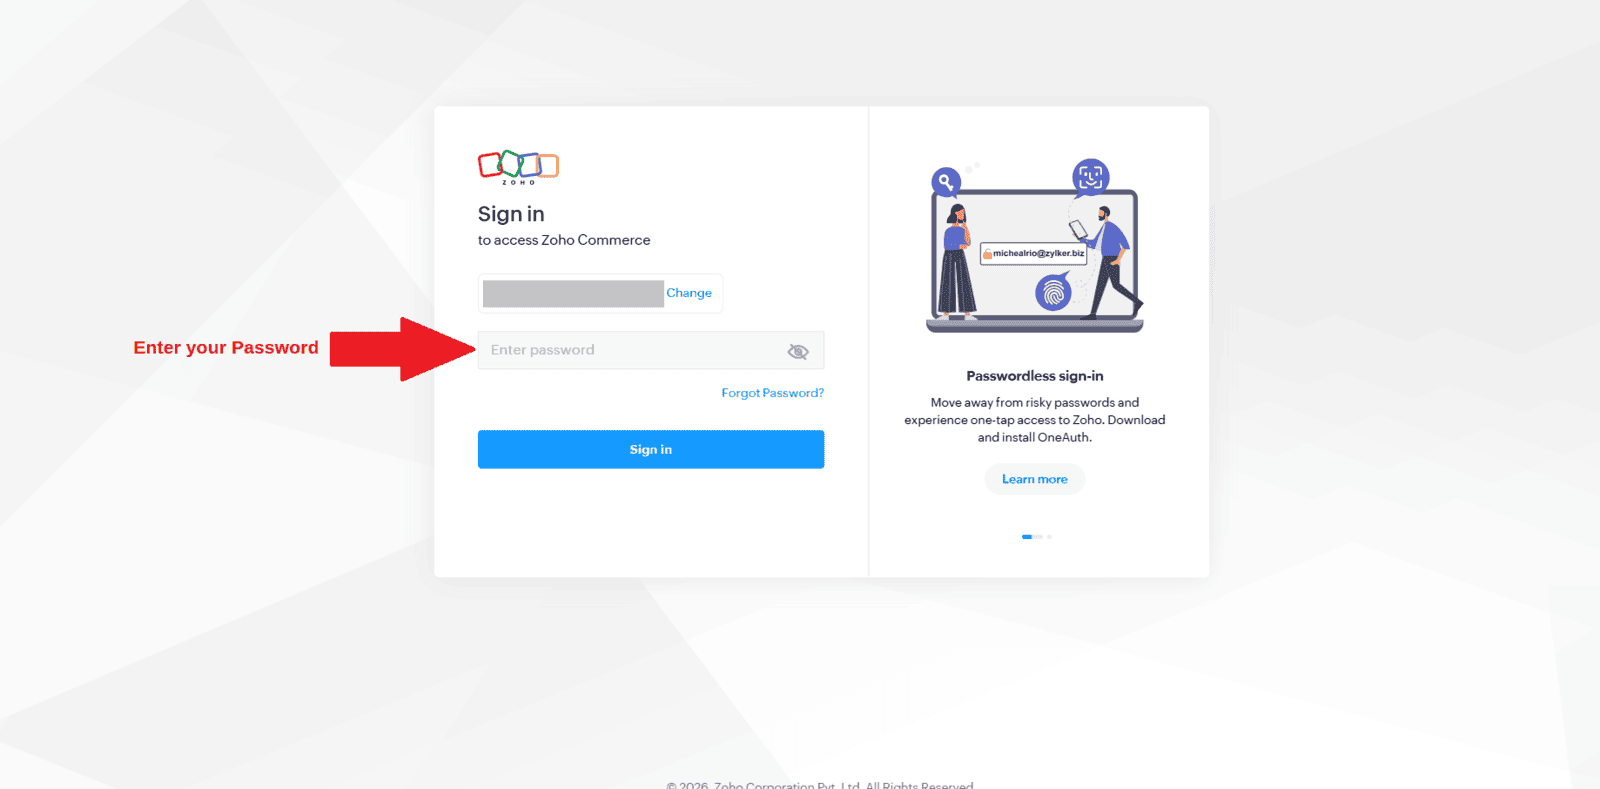
3. After successful authentication, return to the Migration Tool.
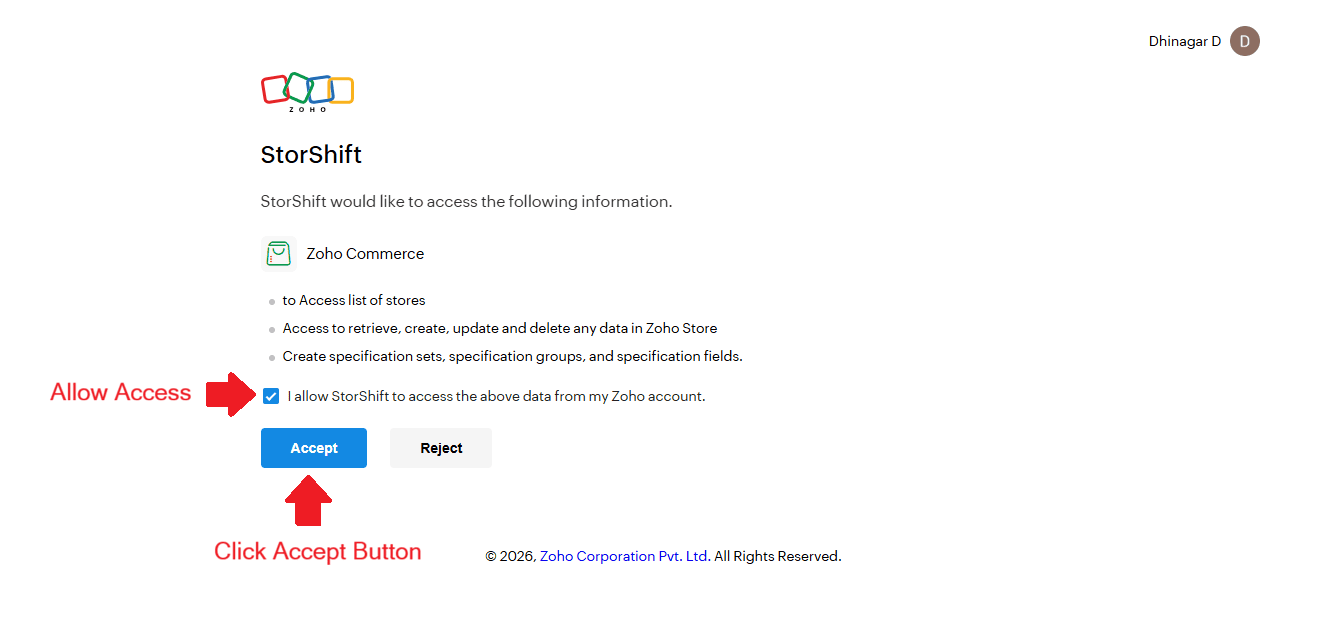
Migration Tool Authorization
1.Tick the confirmation checkbox.
2.Click the Accept button.
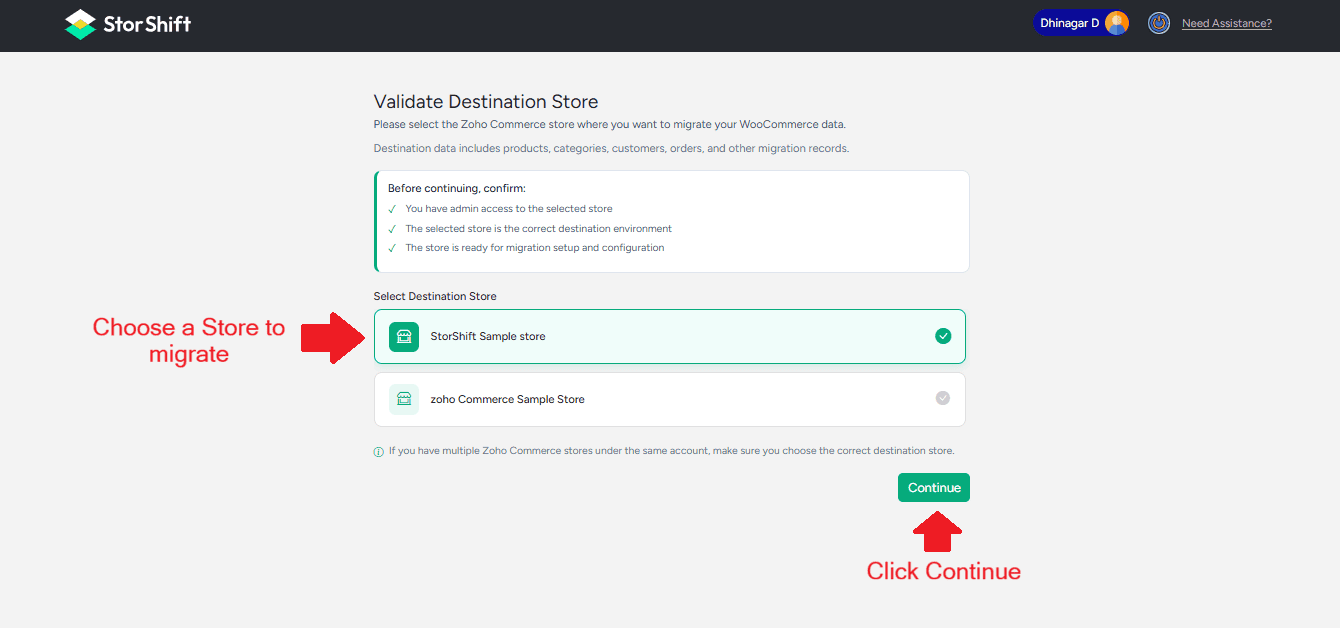
Select Destination Store
- Select the destination store where you want to migrate data.
- Click Continue.
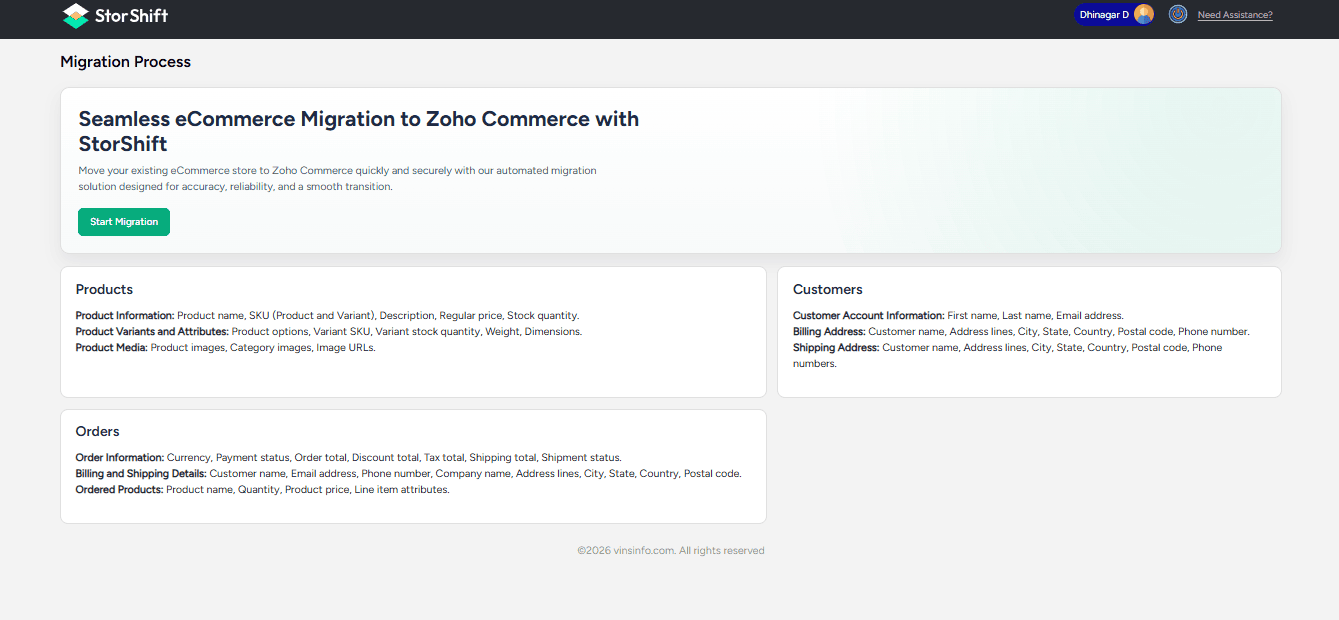
Migration Overview
After selecting the destination store and clicking Next, you will be redirected to the Migration Process page.
- Products and their related information
- Customer details
- Order data
Review the migration summary and click Start Migration to begin the migration process.
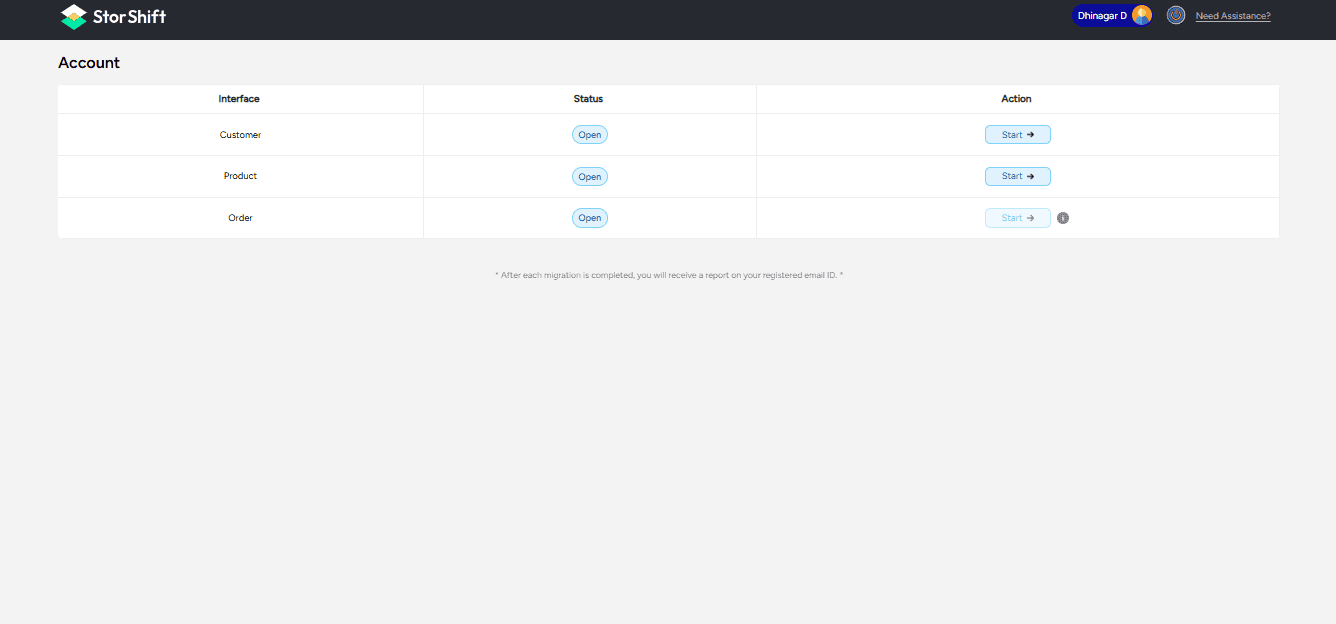
Start Migration
You will see migration options for:
- products
- Customers
- Orders
Note: Products, Customers, and Orders can be migrated individually depending on your needs. If only Orders are migrated, the associated Products and Customers will be automatically created from the order data.
Please note that individual Order migration will not be enabled initially. Once the system is prepared and ready for Order migration, you will receive a confirmation email. After receiving this notification, you can proceed with migrating your Orders.
If you plan to migrate all three, we recommend migrating Products and Customers first, followed by Orders, to ensure proper data mapping and to avoid migration errors. Once Product and Customer migration is completed, you will receive a confirmation email when Order migration is ready. You can then proceed with Order migration.

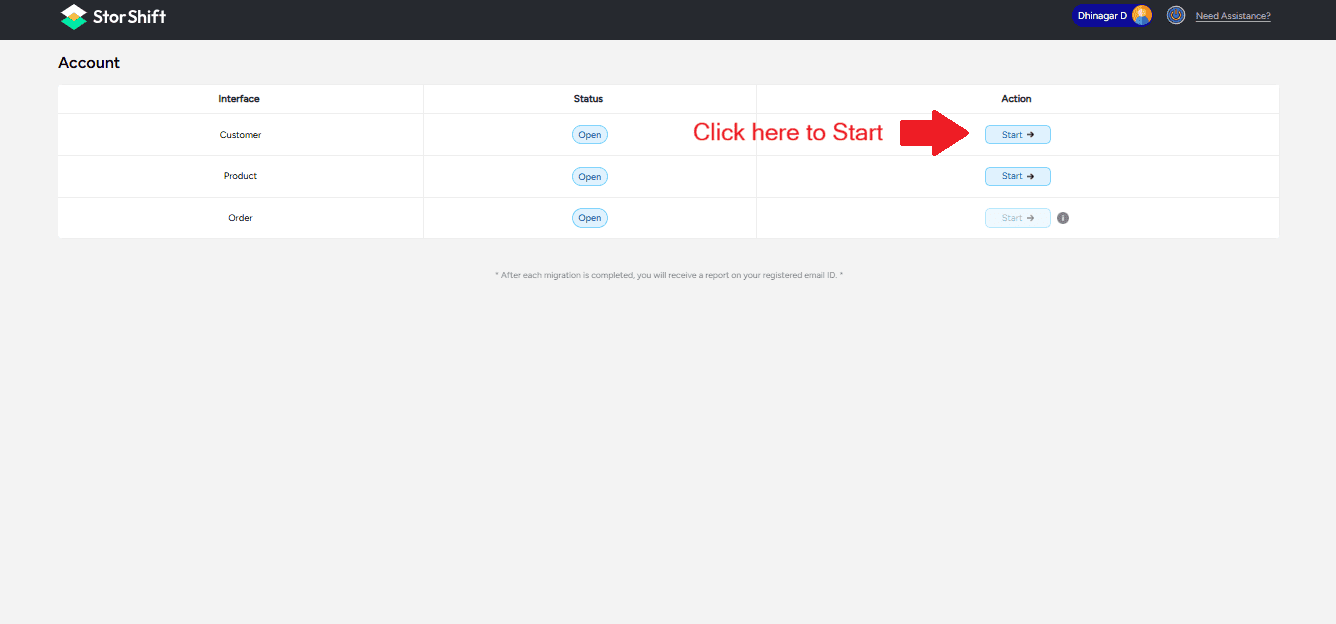
Click the Start button for each entity (customer, product, order) in the dashboard for to start migration.
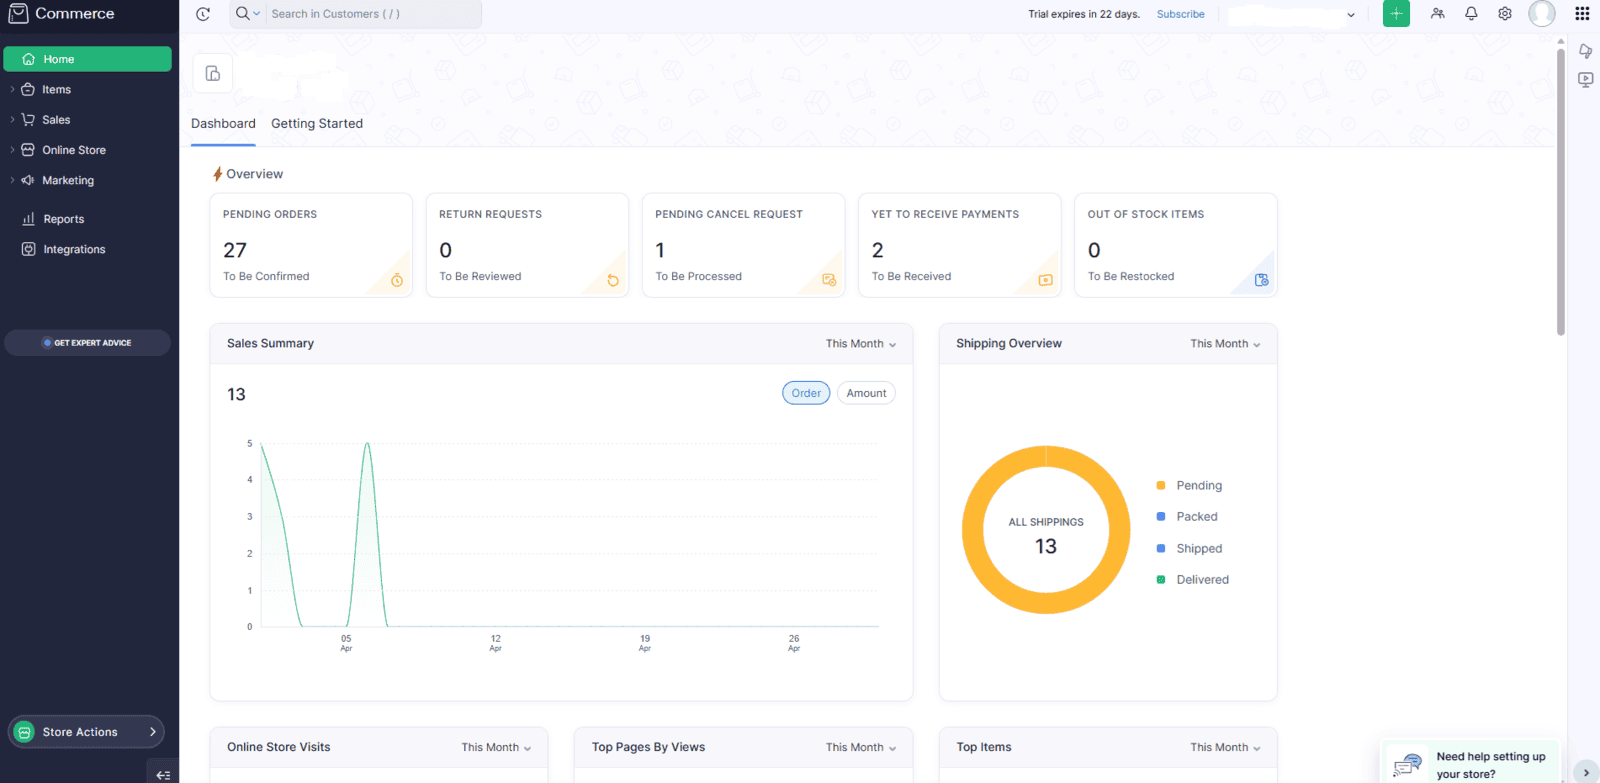
Main Dashboard
After completing authentication and store selection, you will be redirected to the Main Dashboard. This dashboard provides an overview of the migration process for Customers, Products, and Orders, showing the number of records migrated from source to destination.
Ensure the Zoho Commerce store is published, and the customer portal is enabled in Zoho commerce store to automatically send invites to migrated customers.
Zoho Commerce Store Publication
This guide will help you publish your Zoho Commerce store and enable the Customer Portal.
1. Open the Zoho Commerce store Admin Panel
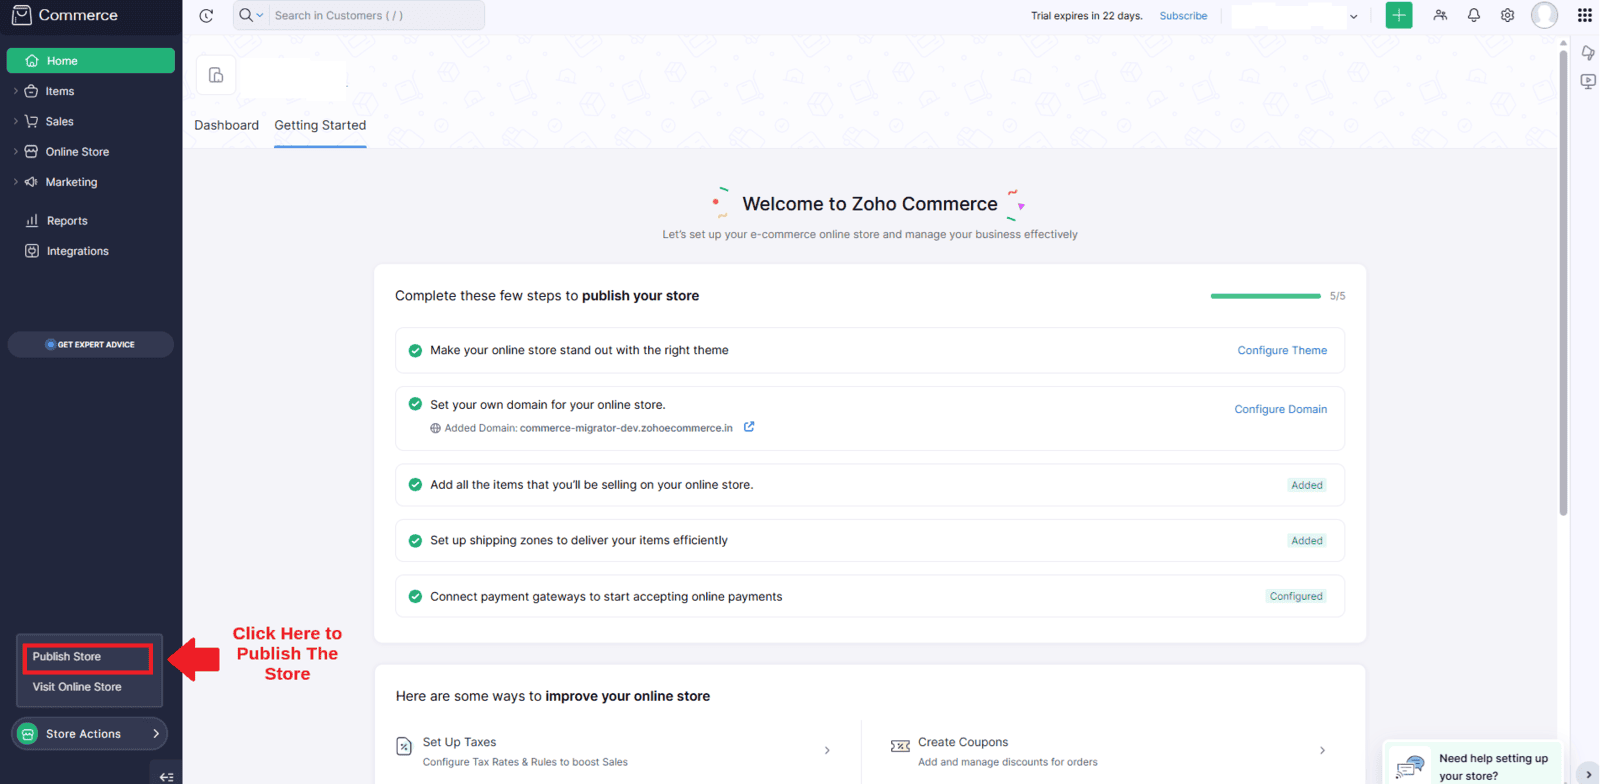
2.Navigate to the left sidebar and locate the Store Actions button at the bottom.
3. Hover over the Store Actions button to view available options.
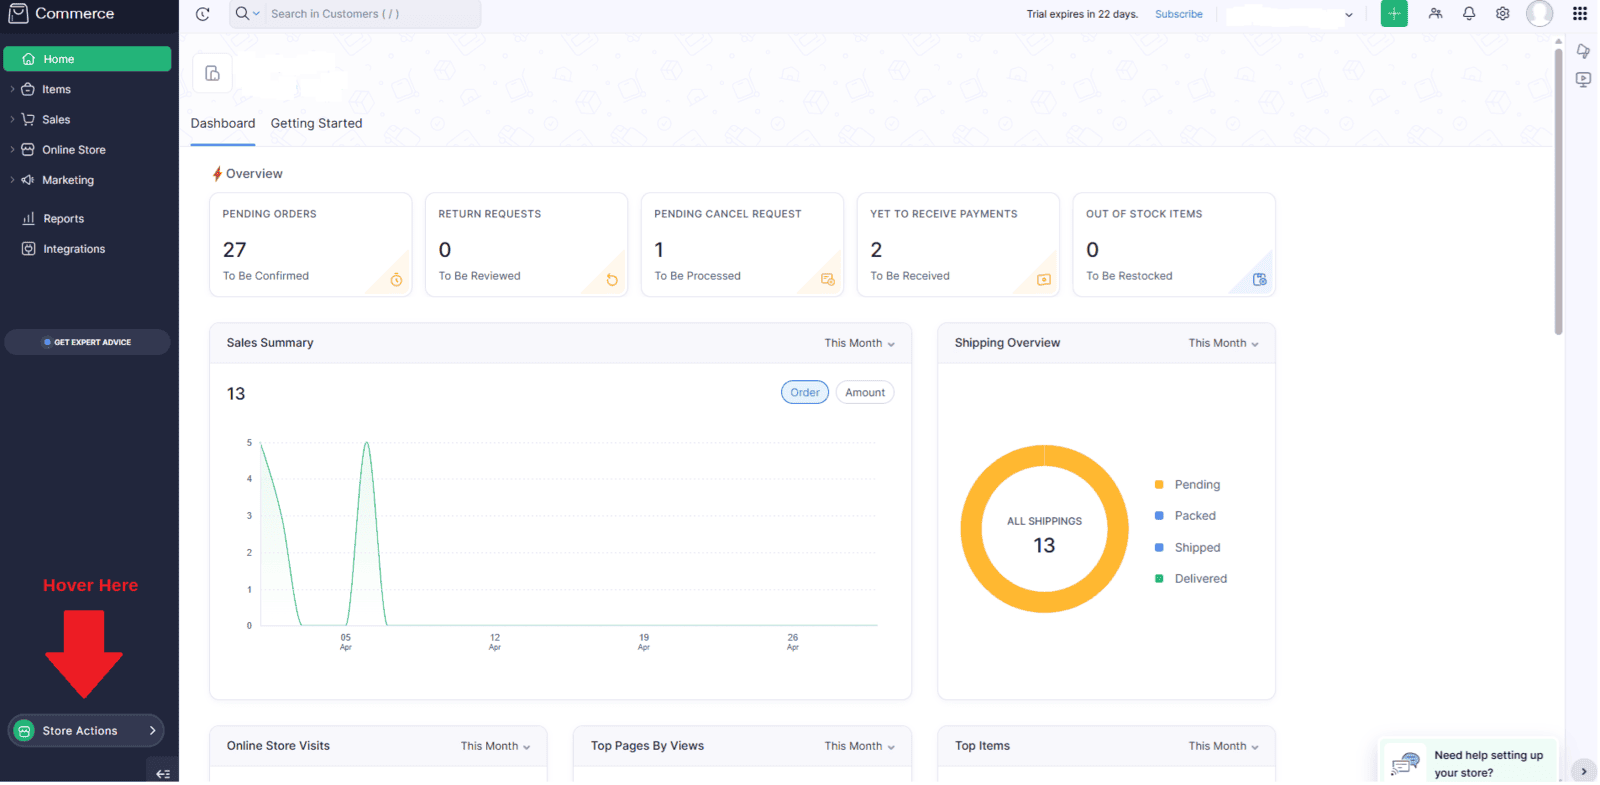
4. You will see options such as Publish Store and Visit Online Store.
5. Click on Publish Store to make your store live.
6. In the alert popup, click the Publish button.
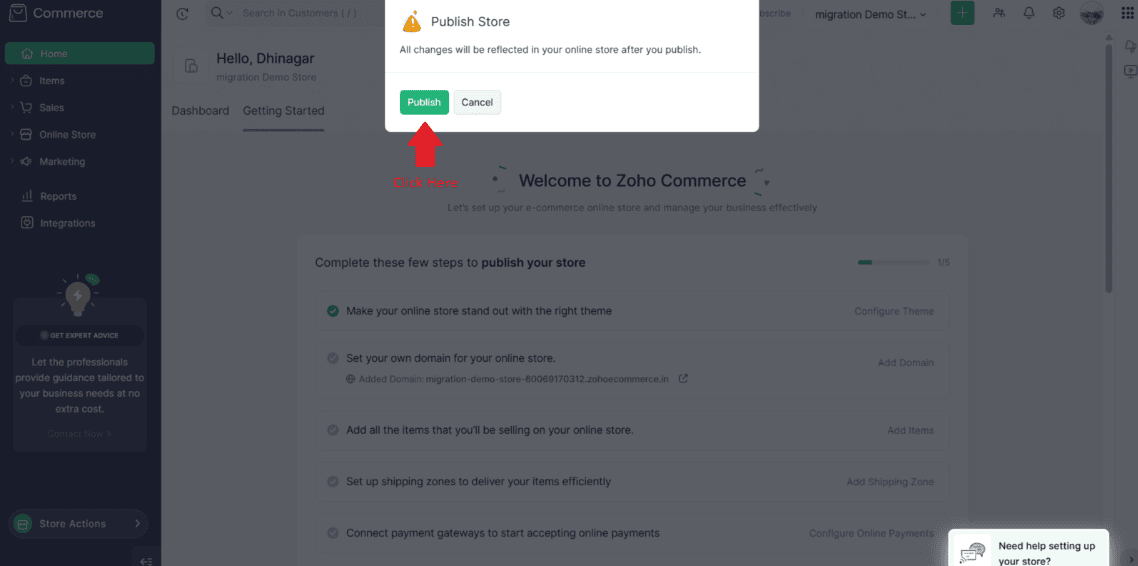
Note: This popup appears only when the store is published for the first time.
8.And Click Publish Button to Publish the Store
Now the Store is Published Success Fully
Enable Customer Portal in Zoho Commerce
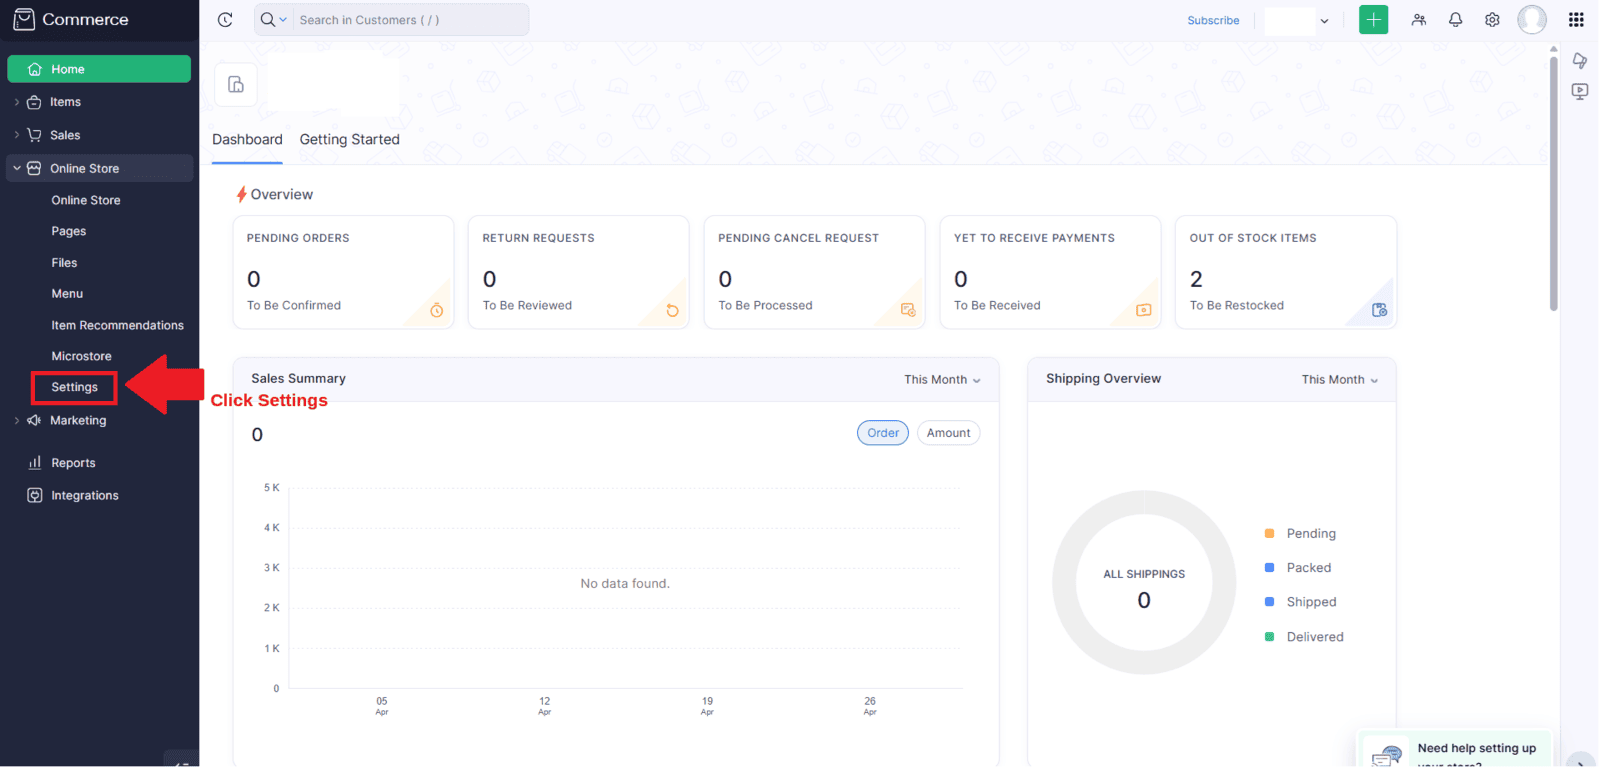
1. From the Zoho Commerce Store Admin Panel, go to the left sidebar.
2. Click on Online Store.
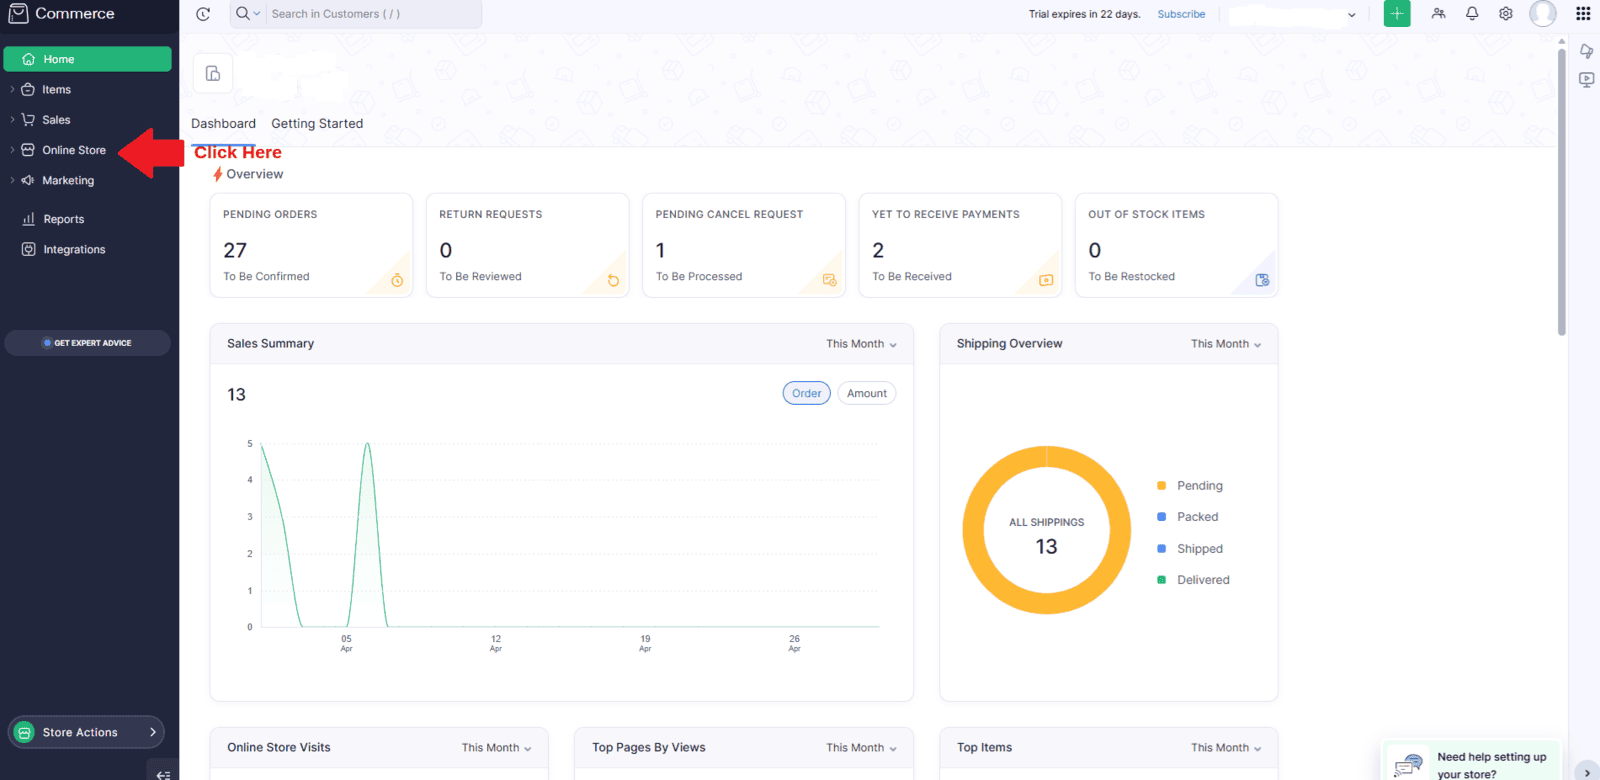
3. From the dropdown menu, select Settings.
4. In the Settings page, use the search bar and search for Customer Portal.
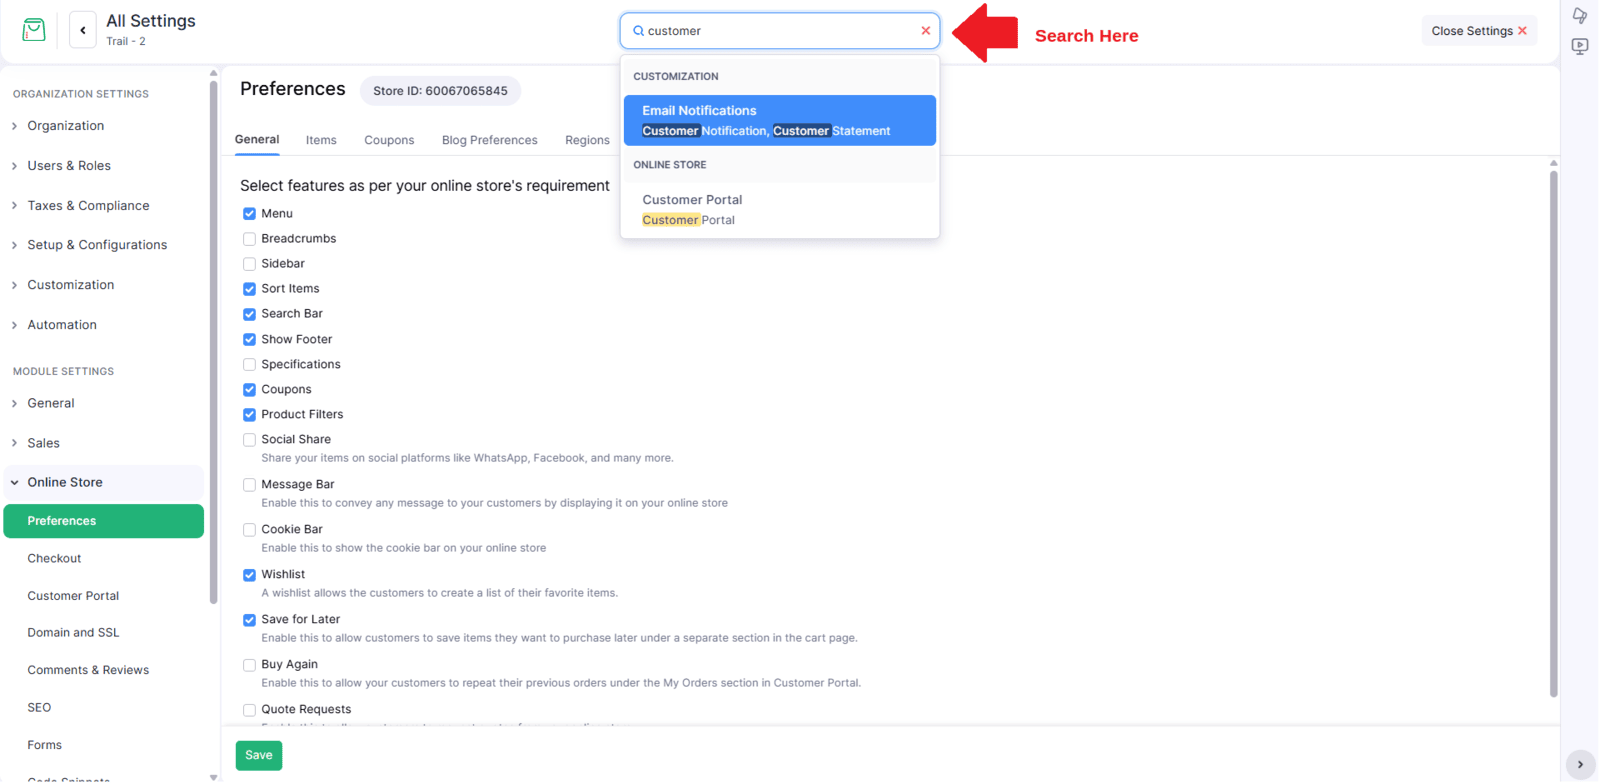
6. Enable the Customer Portal option
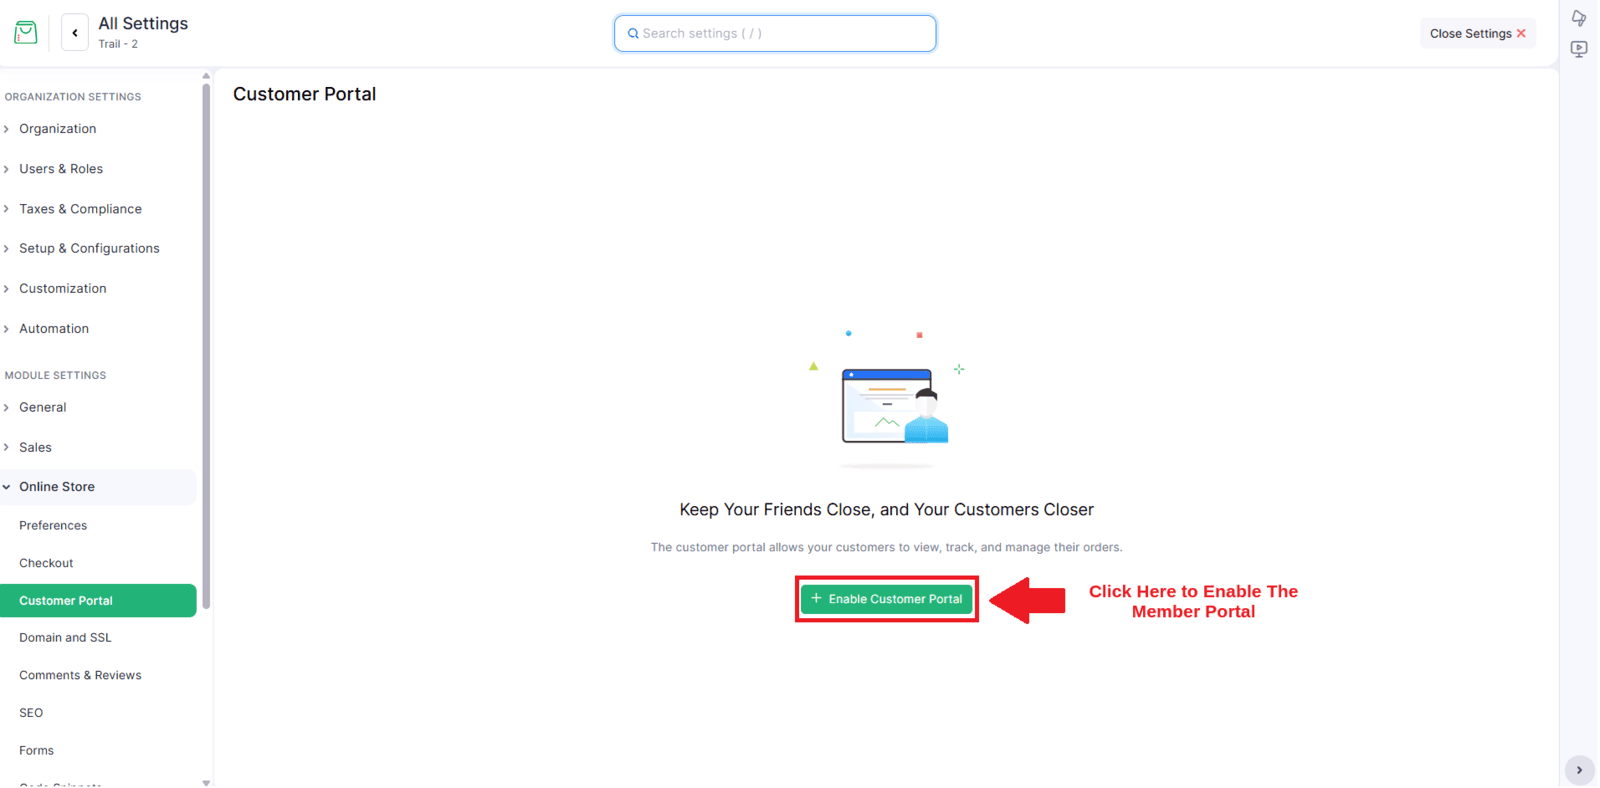
7.Ensure that the Customer Portal is successfully enabled. Once enabled, you are ready to proceed.

Mapping
Once your store has been successfully published and the customer portal is enabled, you can proceed to the Mapping section .
Customer Mapping
On the main dashboard, click "Start" to initiate the migration process and verify the customer field mapping between WooCommerce and Zoho Commerce.
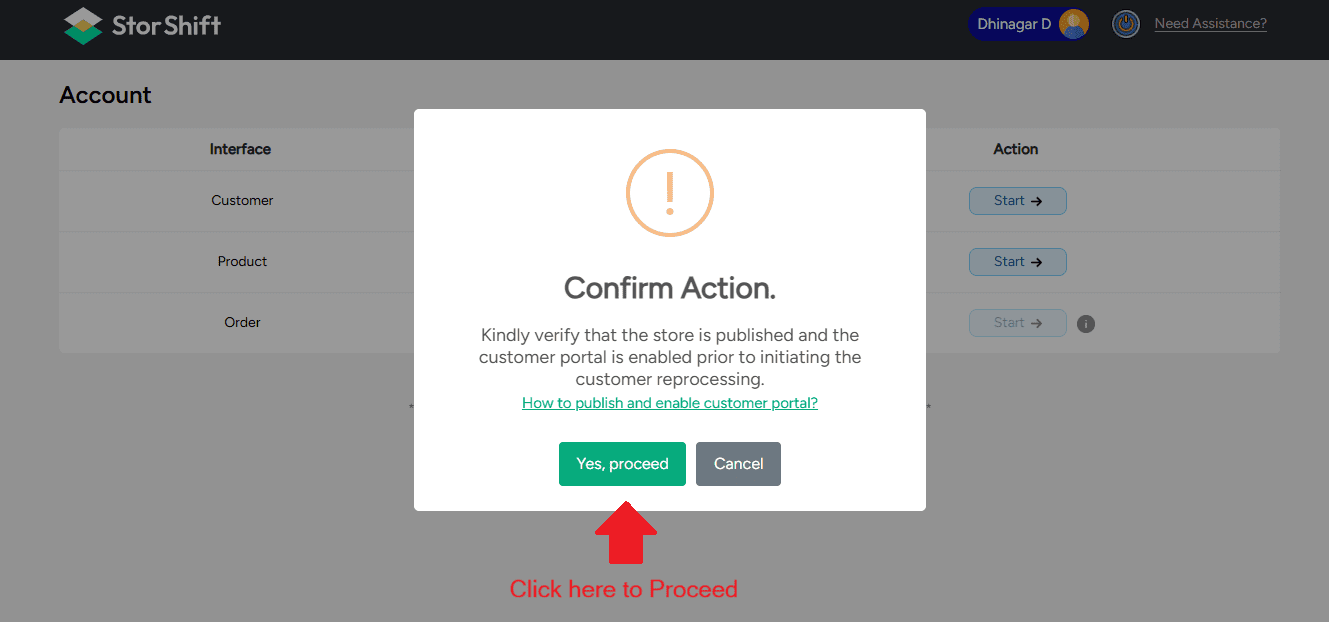
1.Click Start Button to Start the migration Process
Kindly verify that the store is published and the customer portal is enabled before initiating customer reprocessing.
2.Confirm the message and click Yes, proceed and Start to start the migration.
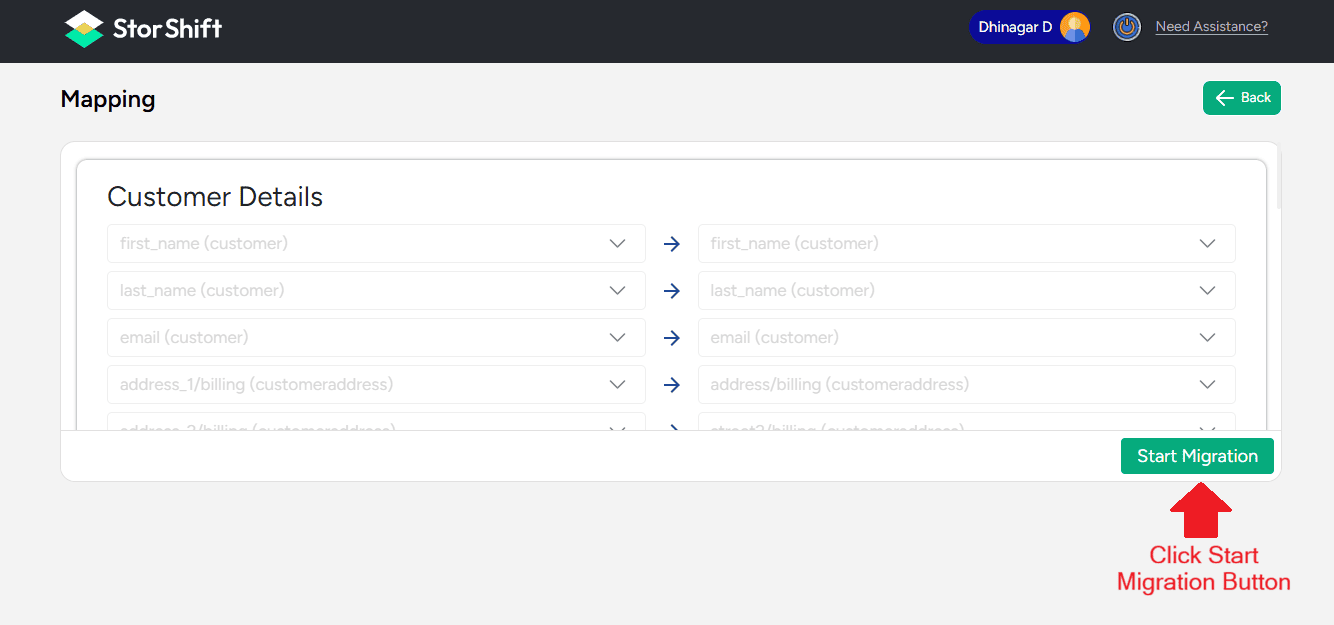
After verifying the mapping details, click the Start Migration button to begin customer data migration.
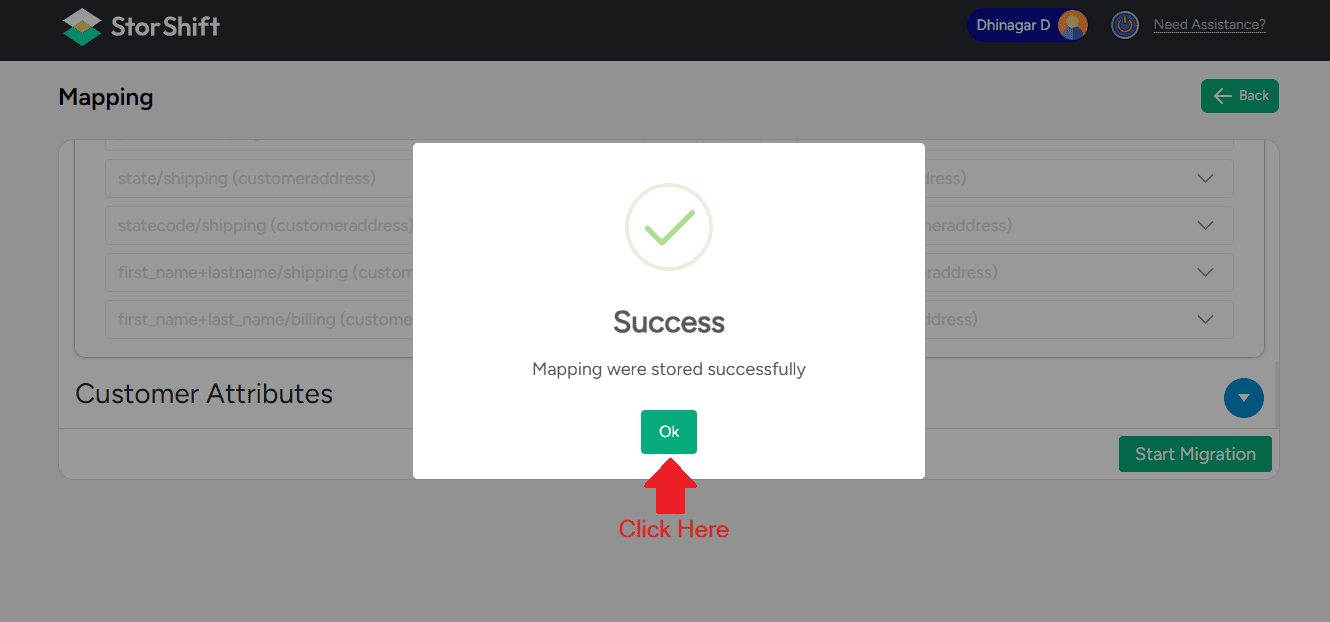
A success message will appear confirming that the mapping has been stored successfully,
Go back to The Main dashboard to monitor the migration progress. By clicking the back Button
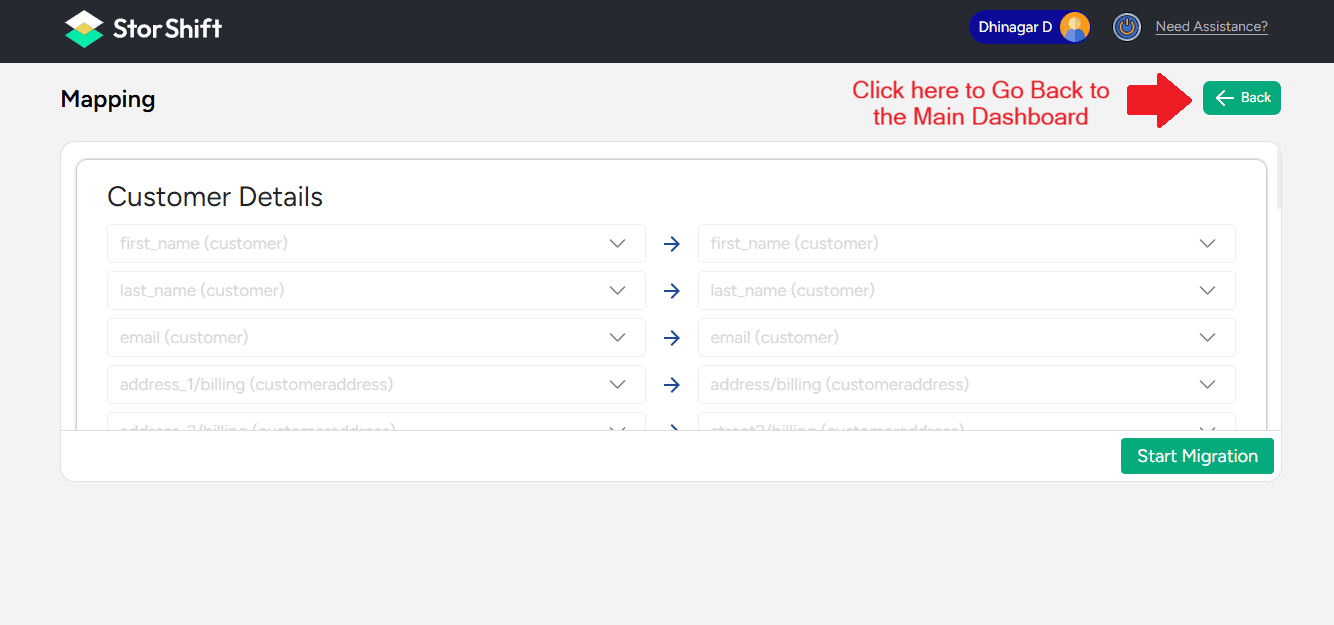
The main Dashboard will show the Migration Information
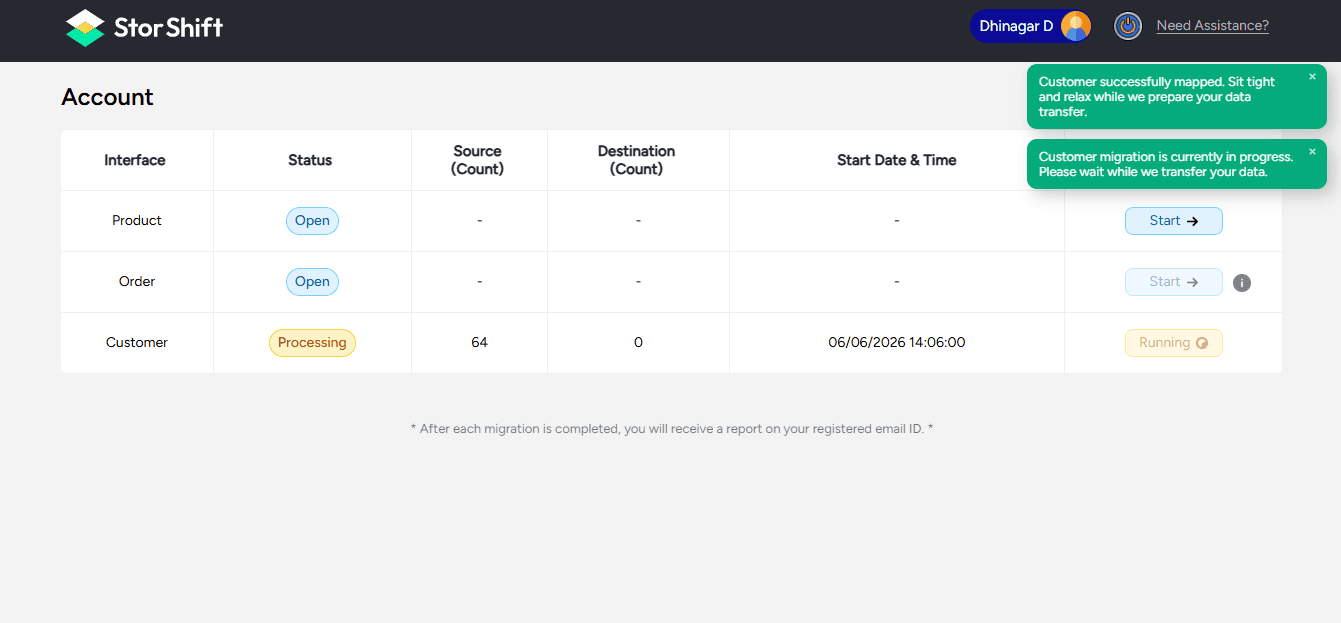
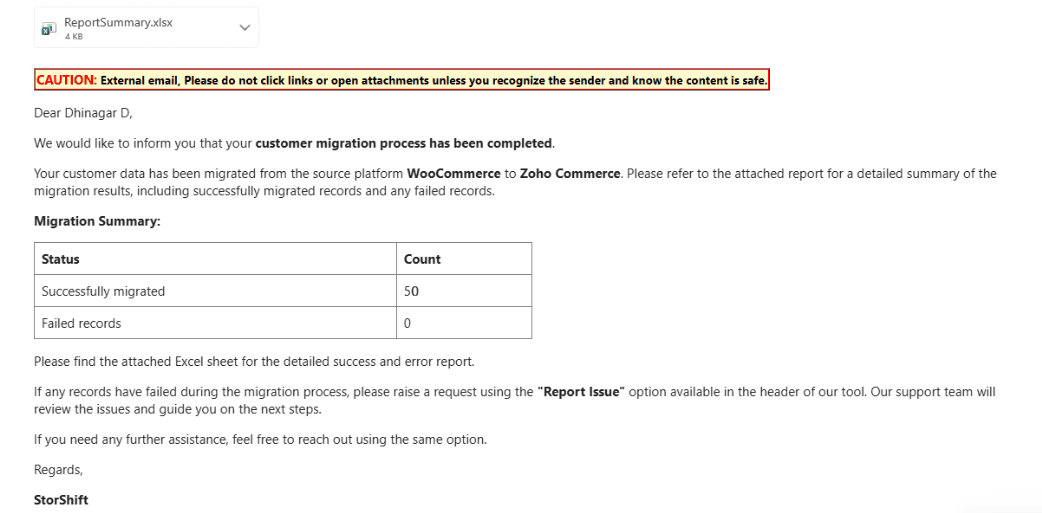
After completion, you will receive an email containing the status of the customers migrated, including both successful and failed records.
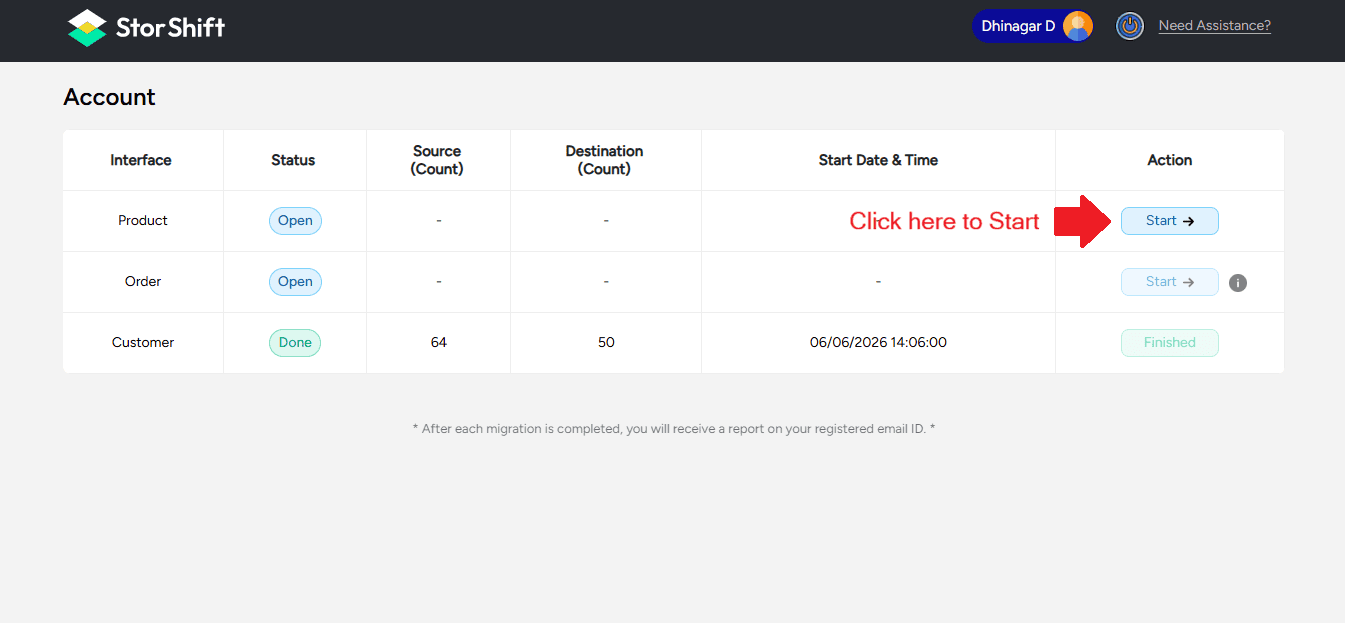
Product Mapping
On the main dashboard, click "Start" to initiate the migration process and verify the product field mapping between WooCommerce and Zoho Commerce.
Click Start Button Start the Migration Process
Once confirmed, click the Start Migration button to start migrating product data.

A success message will appear confirming that the mapping has been stored successfully
The main Dashboard will show the Migration Information

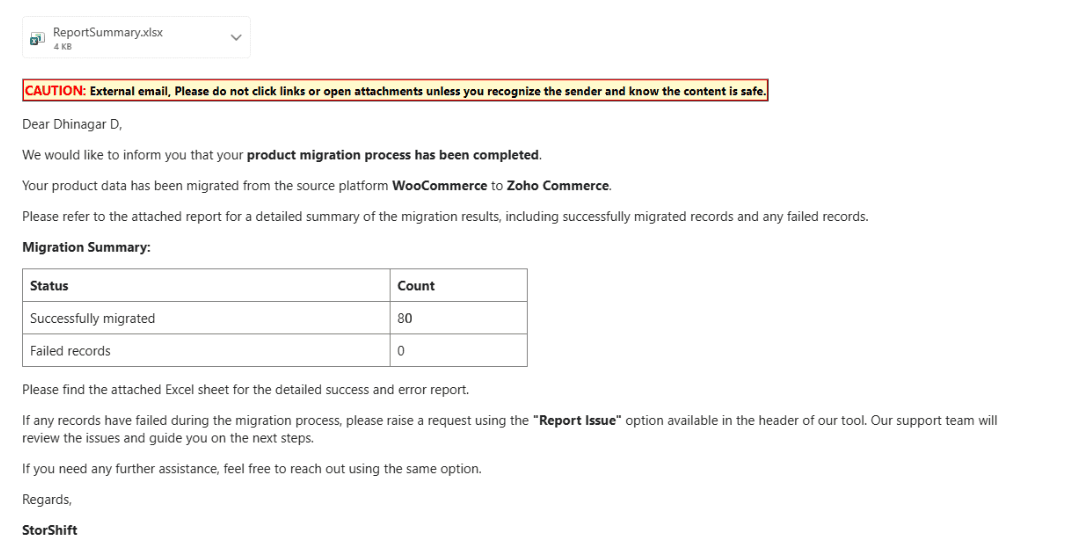
After completion, you will receive an email containing the status of the products migrated, including both successful and failed records
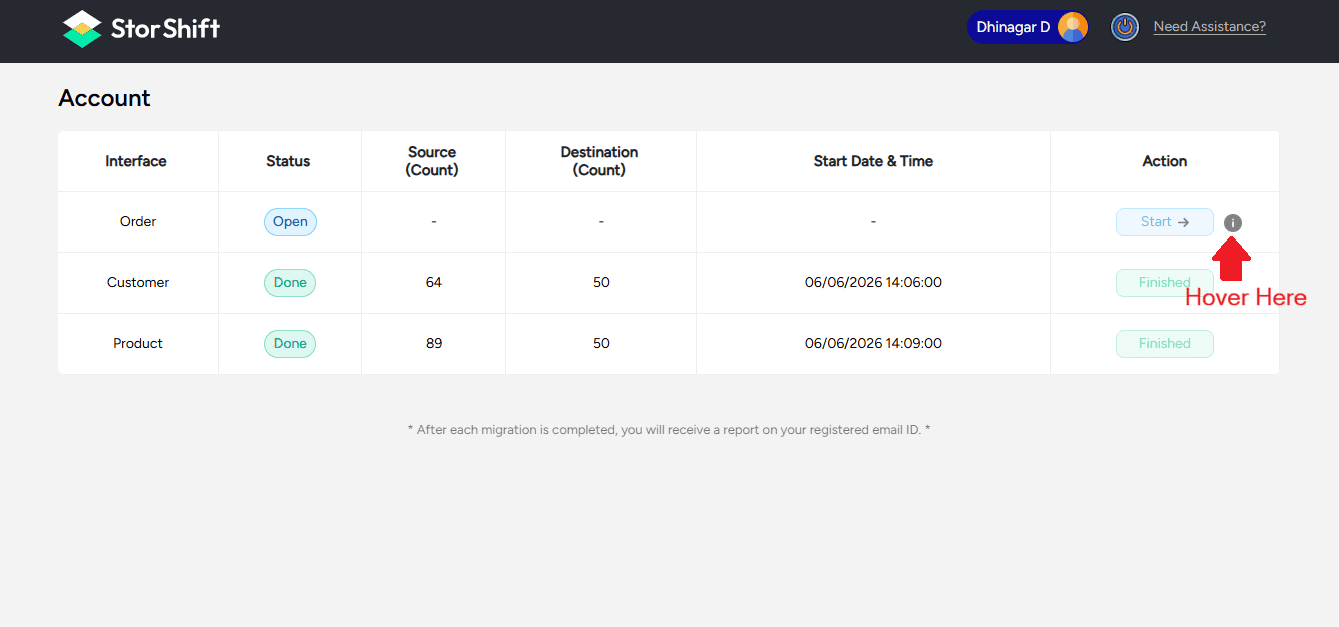
Order Mapping
On the main dashboard, click "Start" to initiate the migration process and verify the order field mapping between WooCommerce and Zoho Commerce.
Note: Order migration will not be enabled immediately, whether you migrate Orders individually or after completing Customer and Product migrations. Once the system is ready for Order migration, you will receive a confirmation email. You can proceed with Order migration after receiving this notification.
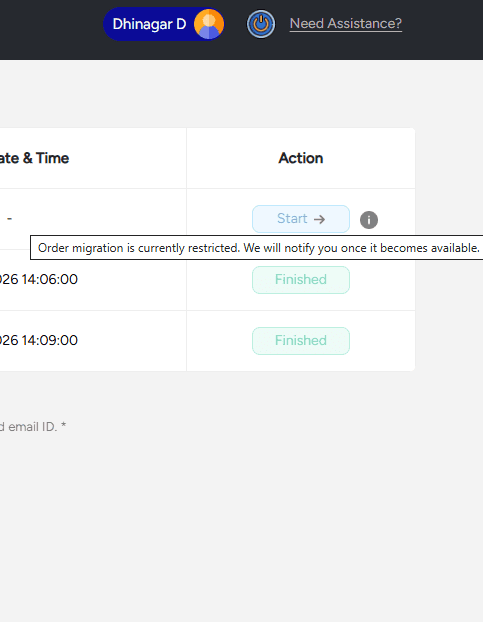
1.Hover Above the “ i “ Icon near the Start Button
Please read the instructions before starting the migration.
The image below shows the page after order migration is enabled and you will receive a Mail once the Order Migration Feature is Enabled
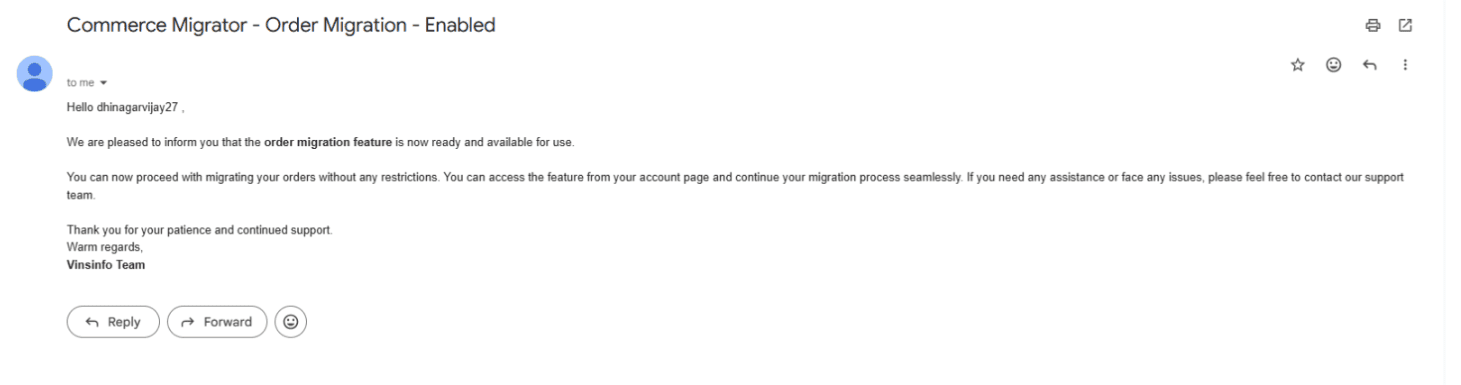
And click Next to Start Migration process...
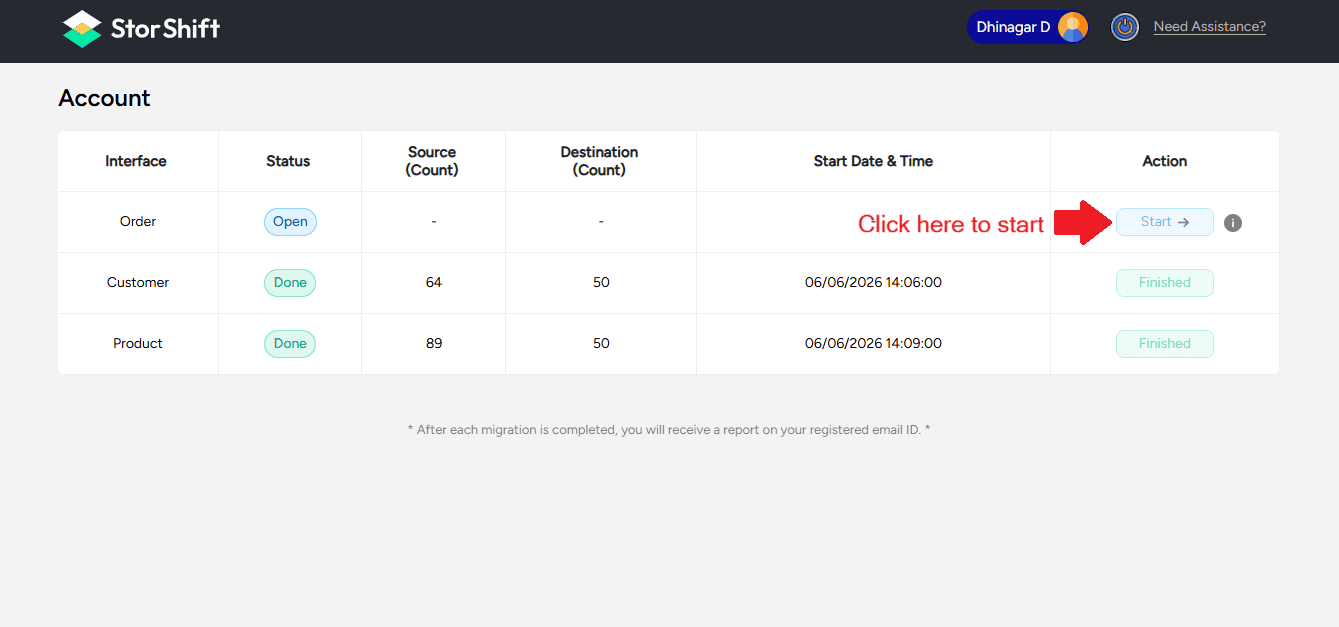
Once confirmed, click the Start Migration button to start migrating Order data.
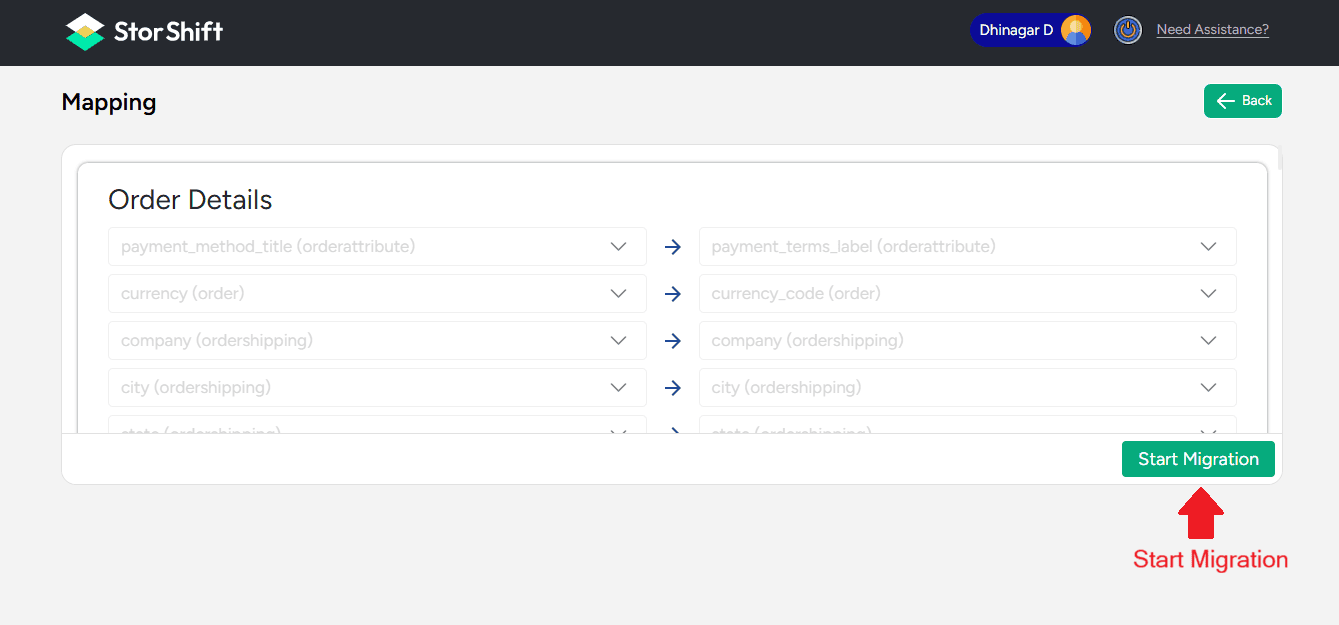
A success message will appear confirming that the mapping has been stored successfully
Go back to The Main Mapping dashboard to monitor the migration progress. By clicking the back Button
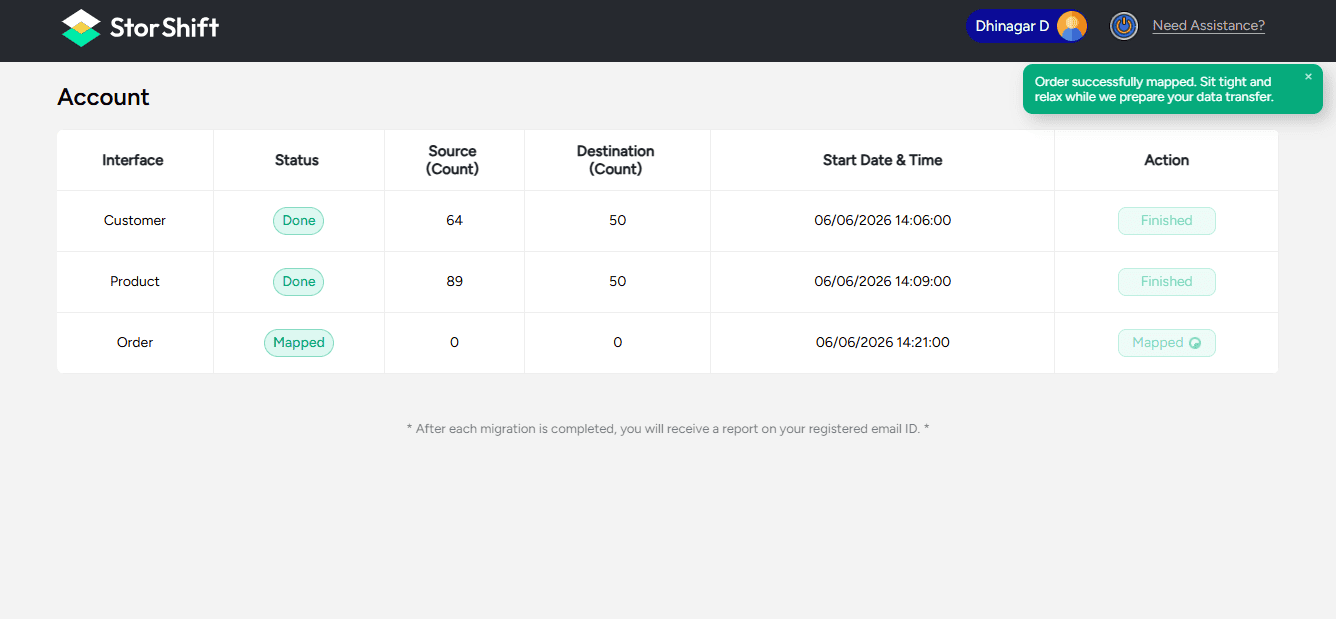
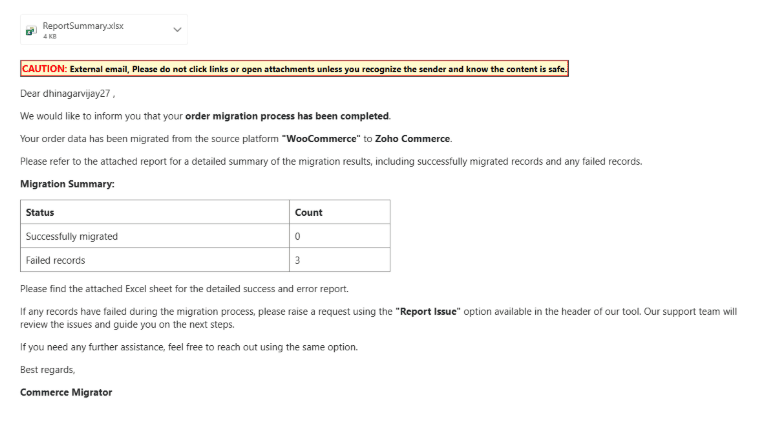
After completion, you will receive an email containing the status of the orders migrated, including both successful and failed records
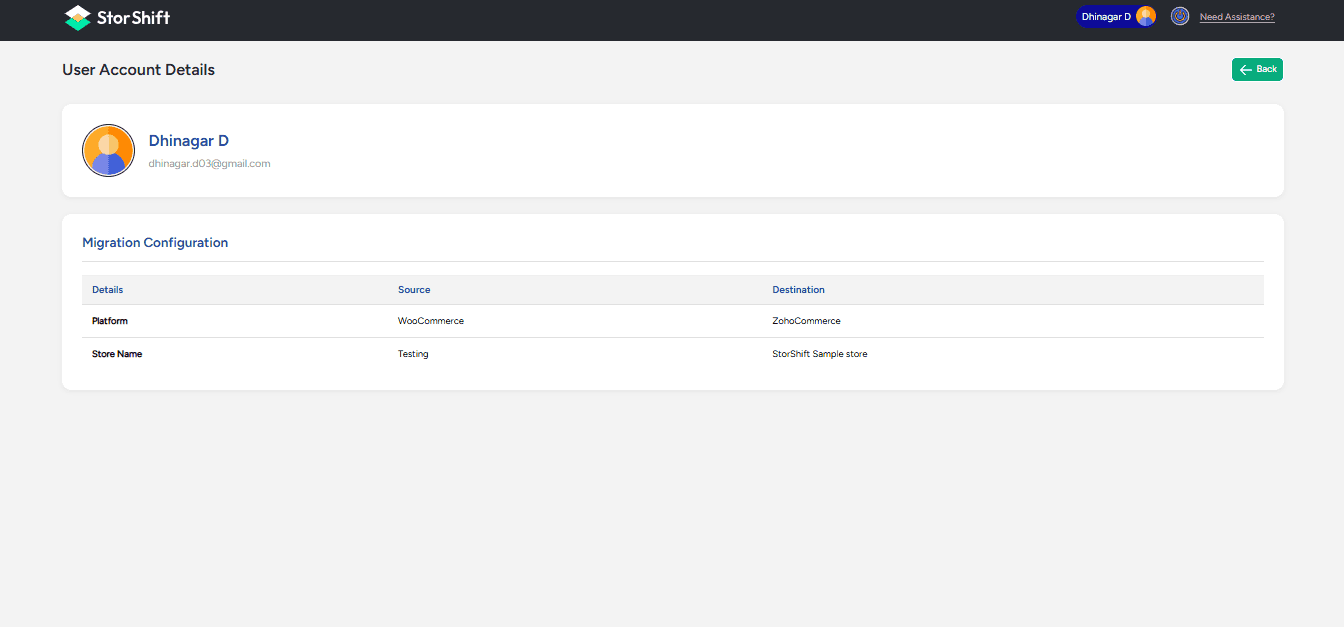
Account Information
You can view your account details and migration information from the Account page of the Migration Tool. Click the Mail button at the top
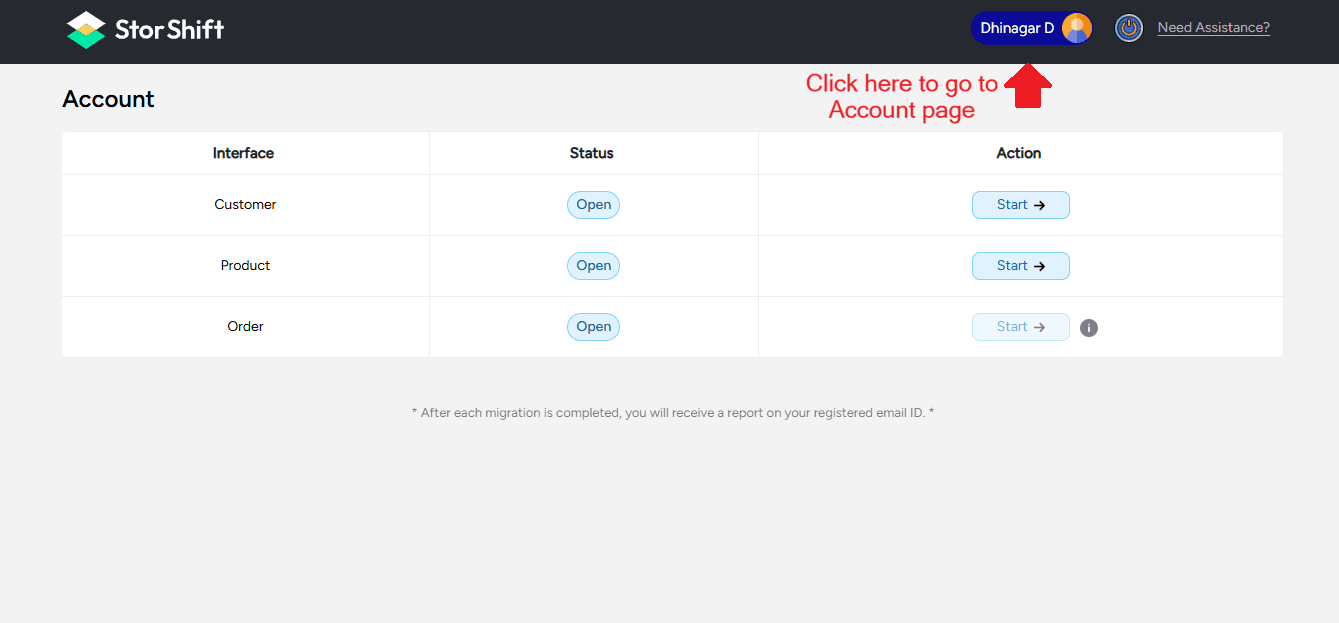
Review your account and migration details on the Account page.
Migration Completed Successfully

Your store data has now been successfully migrated to Zoho Commerce. All selected products, customers, and orders are securely transferred and properly structured in your destination store.
We recommend reviewing your Zoho Commerce admin panel to verify the migrated data and ensure everything is functioning as expected. Once verified, you can confidently continue managing your business operations directly from Zoho Commerce.
If you need any assistance, our support team is always available to help ensure a smooth and successful transition.
BigCommerce to Zoho Commerce Migration – Assisted Service
Currently, direct automated migration is available for selected platforms. For BigCommerce migrations, we provide assisted migration support.
If you want to migrate your store from BigCommerce or Shopify to Zoho Commerce:
1.Select BigCommerce and Click Next.

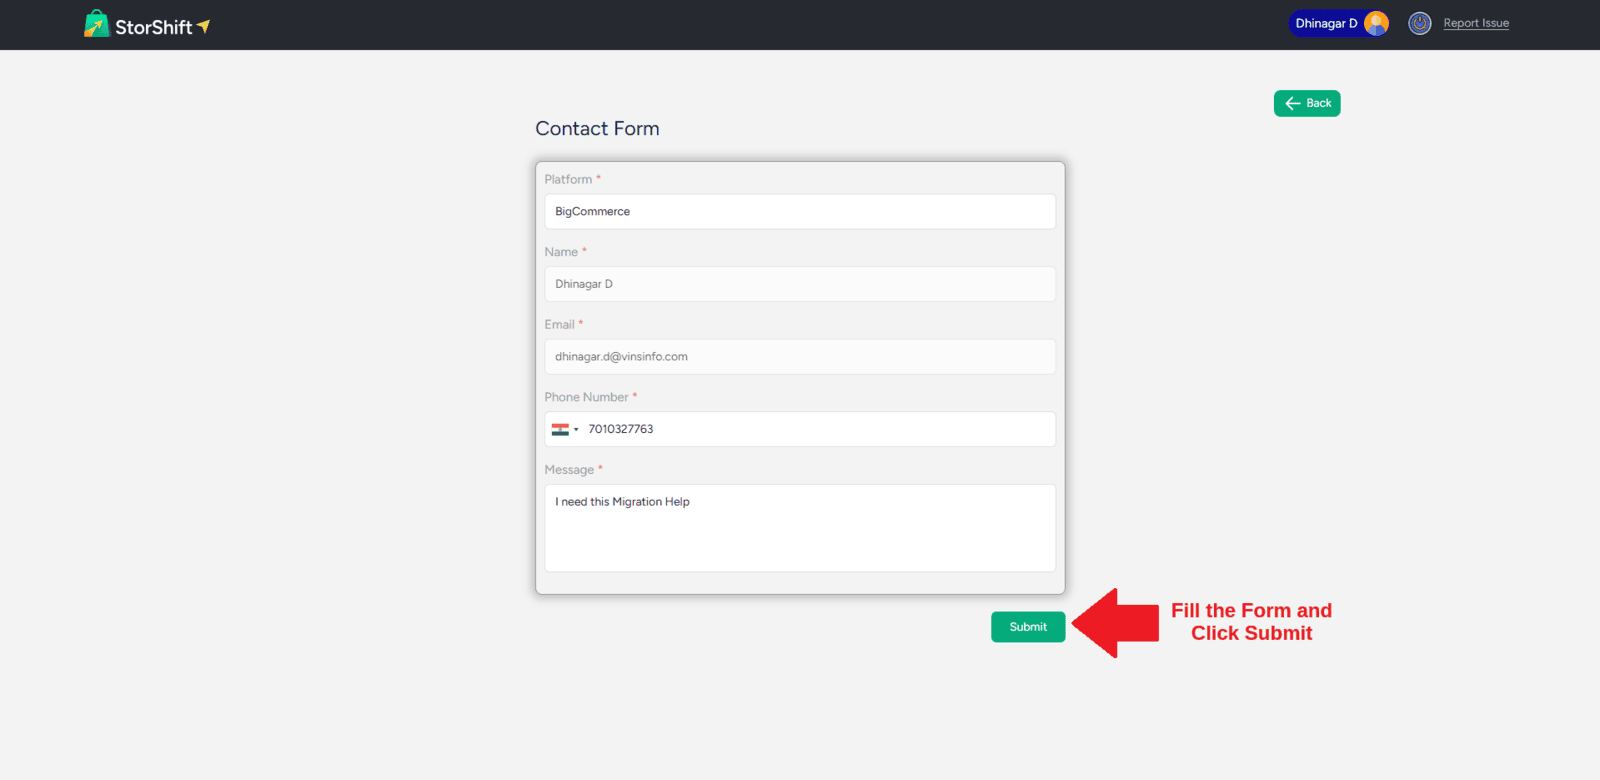
2.Fill out the contact form with the required details.
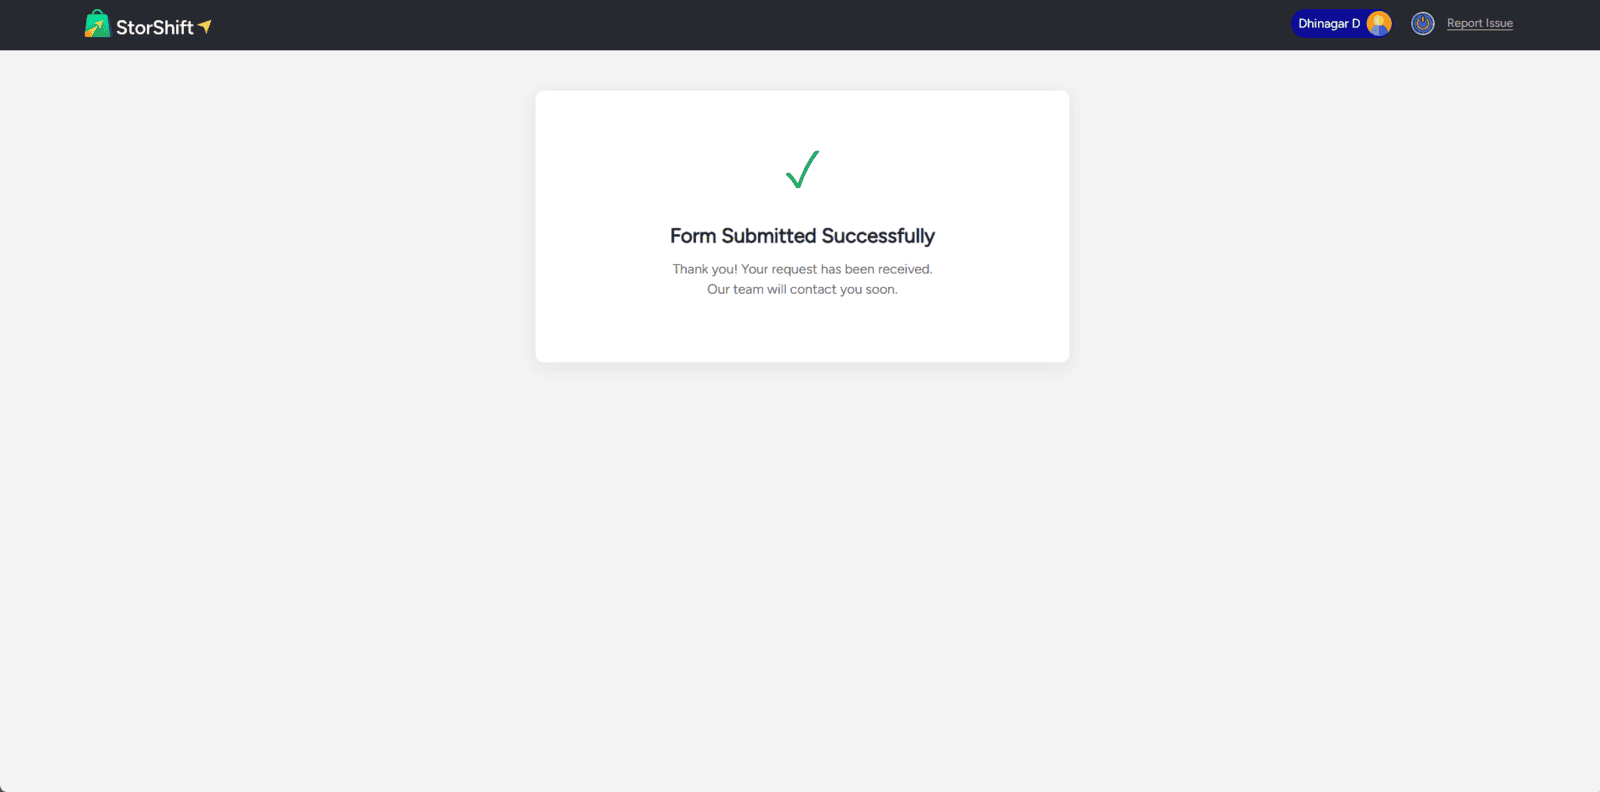
3.Submit the form.
Our support team will review your request and contact you to assist with the migration process.
Note: BigCommerce migration is handled as a support-assisted service. Once you submit the request form, our support team will reach out to gather the required store information and complete the migration.
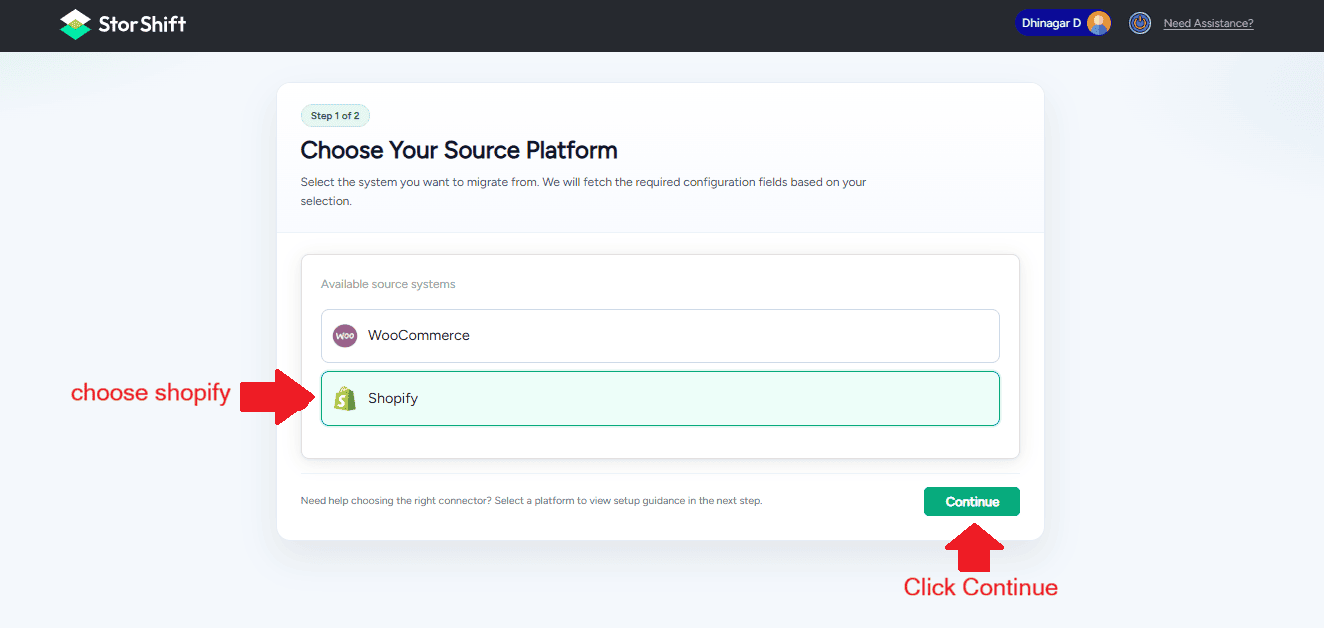
Shopify to Zoho Commerce Migration – Assisted Service
If you want to migrate your store from BigCommerce or Shopify to Zoho Commerce:
1.Select Shopify and Click continue.
2.Fill out the contact form with the required details.
3.Submit the form.
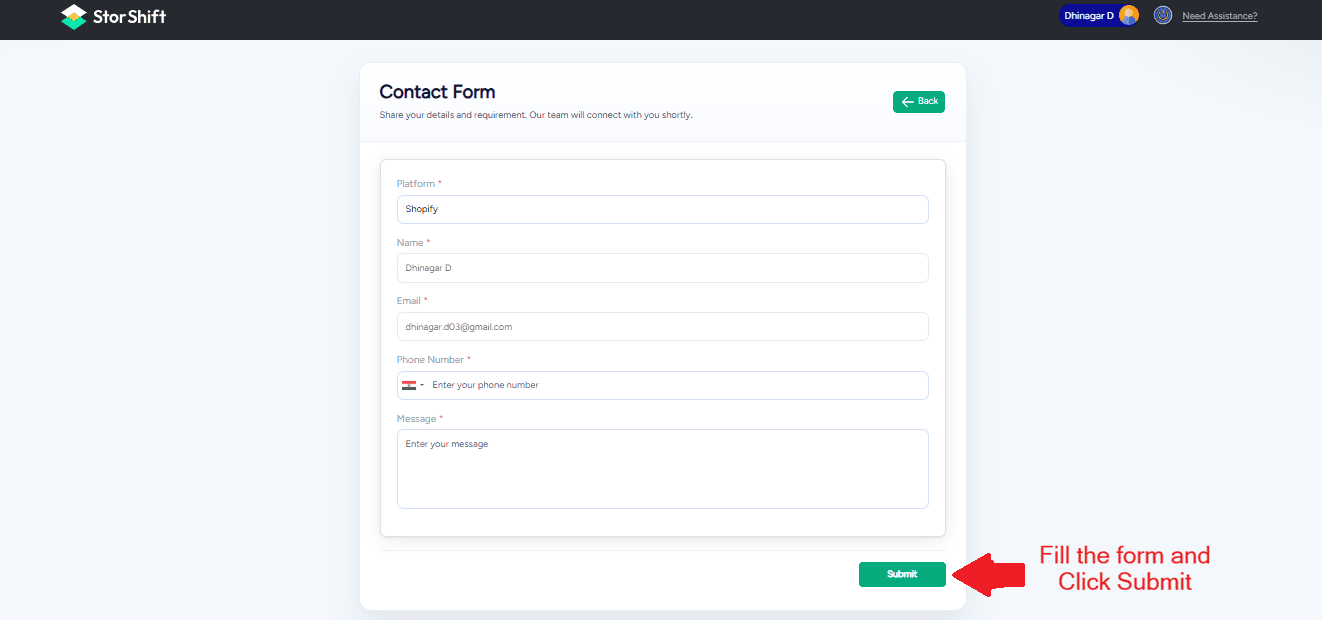
Our support team will review your request and contact you to assist with the migration process.
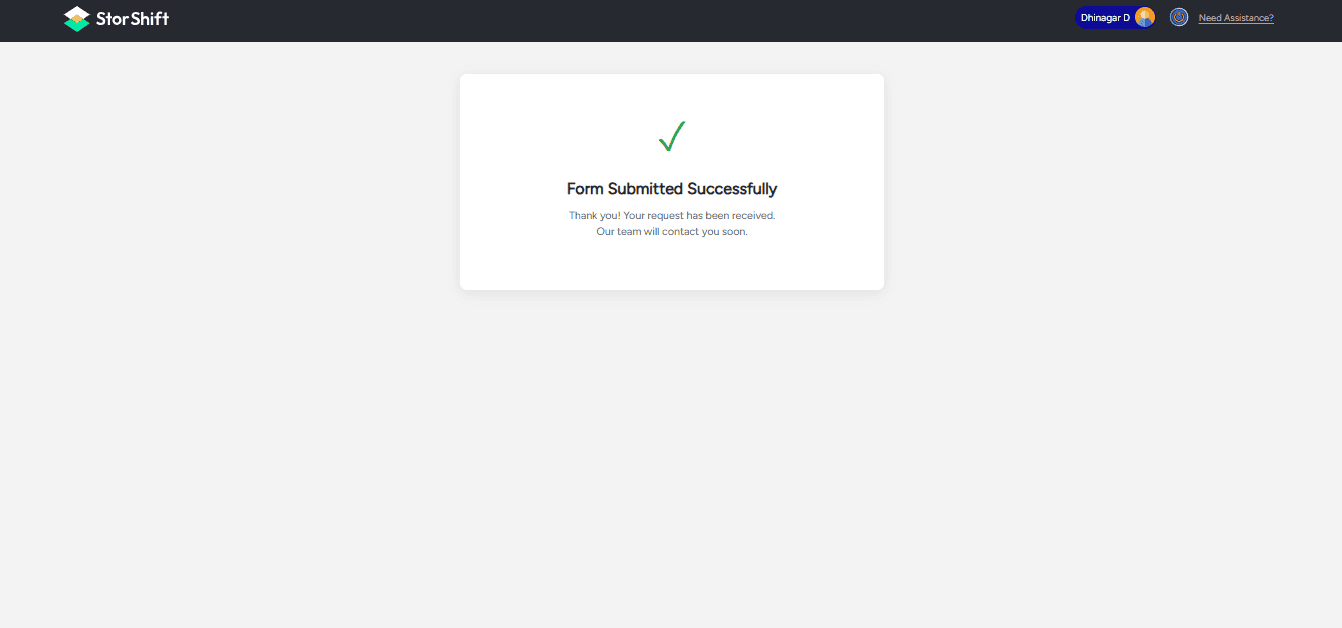
Note: Shopify migration is handled as a support-assisted service. Once you submit the request form, our support team will reach out to gather the required store information and complete the migration.
Content
Checklist
Create Account
Login Page
Source Configuration
Open WooCommerce
Rest API Section
Zoho Authentication
Start Migration
Store Publication
Enable Customer Portal
Mapping
Customer Mapping
Product Mapping
Order Mapping
Account Information
Migration Successfull
Note
Note


